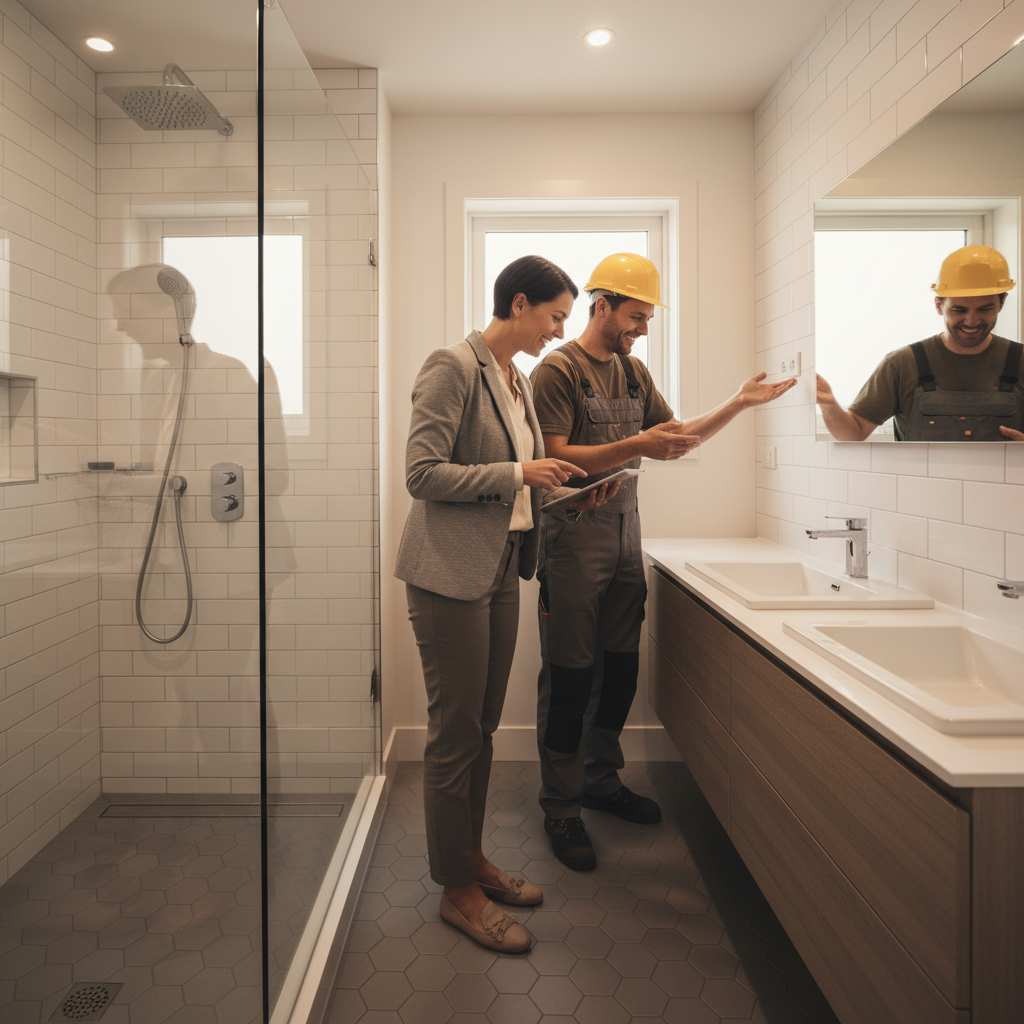
Tile installation for rental bathrooms is the standardized planning and execution of moisture-safe, durable tile systems that reduce callbacks and speed unit turnover. At our London, ON base near 805 Chelton Rd, Mahal Concrete and Constructions follows a repeatable approach so property managers get predictable results. This tile installation guide for rental bathrooms shows how to cut risk and rent faster.
By Mahal Concrete and Constructions • Last updated: 2026-06-02
Summary
For rentals, the right tile system balances durability, cleanability, and fast installation. Prioritize continuous waterproofing, porcelain tiles with low absorption, and rapid-setting materials that shorten downtime. Standardize SKUs, finishes, and layouts across units to reduce waste, simplify maintenance, and speed inspections.
- What you’ll learn: substrate prep, waterproofing, layout, setting, grouting, QA, and turnover playbooks.
- Why it matters: fewer maintenance tickets, safer wet zones, and shorter vacancy periods across multi-unit portfolios.
- Who it’s for: property managers, landlords, and apartment owners overseeing unit turnovers in London and Southwest Ontario.
Table of contents
What is rental bathroom tiling?
Rental bathroom tiling is a specification-driven approach to installing waterproof, cleanable tile assemblies designed for tenant wear and quick turnovers. It emphasizes moisture control, impact resistance, and standardized finishes so managers can reduce maintenance tickets and keep units move-in ready.
In multi-unit settings, repeatability wins. Standardizing tile SKUs, grout colors, and trim profiles streamlines procurement and avoids mismatches during repairs. Clear documentation, including photos and material batch numbers, creates a reliable record for future patch work and cross-building consistency. For landlords and property managers, this means fewer special orders and faster closeouts.
We build these standards into our full unit turnover workflows. From site assessment to the final handover, our crews follow the same sequences across apartments, which helps maintain schedule reliability and predictable quality checks.
Why tiling choices matter in rentals
Right-sized tile specs lower total maintenance by preventing water intrusion, mold growth, and cracked grout. Durable materials and correct slope at wet zones reduce callbacks, while standardized finishes accelerate inspections and tenant acceptance during turnover.
Most rental bathroom issues trace back to three roots: moisture, movement, and maintenance. Moisture penetrates at seams and penetrations when waterproofing is incomplete. Movement occurs when substrates flex beyond tile tolerances, opening grout lines and loosening bond. Maintenance challenges show up when porous tile or grout holds stains and soap scum, increasing cleaning time between tenants.
Here’s the thing: resilient choices up front save many downstream trades from repeat visits. For floors, porcelain’s very low water absorption supports longevity in wet use. For walls, consistent profiles (like 3×6 or 4×12 subway) make future tile matching simpler. And in showers, mosaic sizes on pans help contour to proper slopes without lippage that traps grime.
For background on building drainage around foundations, see this overview of perimeter systems, which underscores how critical water management is to building durability: weeping tile system basics.
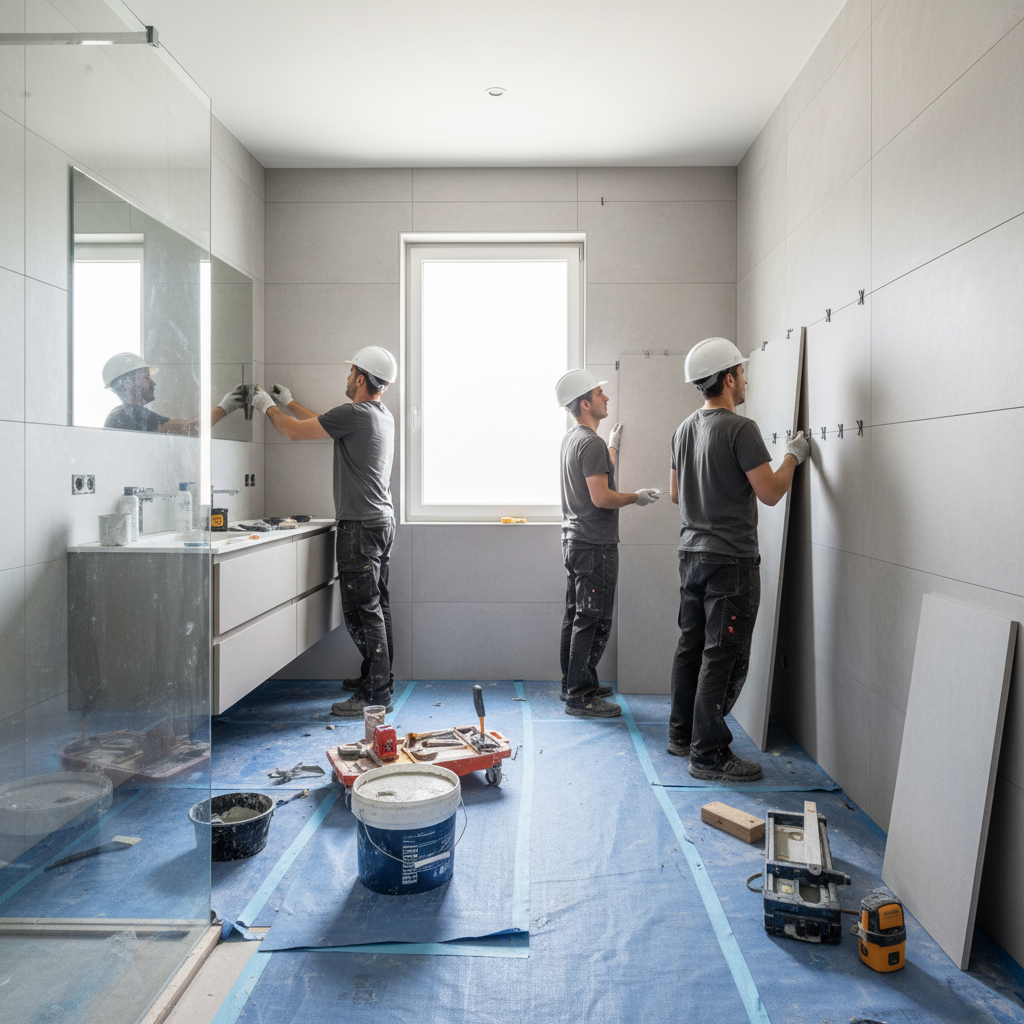
How tile installation works in apartments
Apartment tiling follows a controlled sequence: assess substrate, add waterproofing, set porcelain with the right mortar, and finish with sealed grout. Quality checks focus on slopes, coverage, movement joints, and a clean, uniform finish that passes turnover inspection without rework.
Our teams stage materials near the unit stack to minimize hallway travel and keep common areas protected. A typical sequence runs demo, prep, backer installation, waterproofing, tile layout and setting, grouting, and punch—coordinated with property access schedules and quiet hours. Photo checkpoints document substrate moisture readings, membrane coverage, and final lippage tolerances so property managers have a clear audit trail.
For end-to-end apartment planning, see our apartment renovation checklist. It pairs well with this guide when you’re coordinating multi-trade turnovers across several units.
Prerequisites before you start
Confirm structure and moisture, choose compatible membranes and mortars, and plan logistics. In occupied buildings, coordinate dust control and ventilation. Pre-approve layouts, trims, and grout colors to avoid delays and reduce change orders during tile installation.
- Substrate readiness: Verify flatness and deflection. Patch dips or humps before large-format tile; target a smooth plane to limit lippage.
- Moisture checks: Test cement backers and slabs. Use vapor-retarding or waterproof membranes where needed and respect cure times.
- Safety plan: Control silica dust with HEPA vacs and wet-cut methods. Isolate work zones, post notices, and maintain clear egress.
- Logistics: Book elevators, reserve dumpsters, and stage corridor protection. Pre-deliver tile to reduce downtime.
- Approvals & docs: Capture pre-start photos and approve shop drawings for niches, trims, and accessories.
When working with clients in London, we also coordinate weather impacts on ventilation and drying times. Winter’s dry indoor air can speed cure, while summer humidity can slow it—so sequencing matters for rent-ready targets.
Tile types, waterproofing, and setting methods
For rentals, prioritize porcelain for floors and glazed ceramics or porcelain for walls. Use cement or foam backer with a continuous waterproof membrane. Pair with polymer-modified thinset and stain-resistant grout to simplify cleaning and extend service life between tenants.
Tile and surface choices
- Floors: Matte porcelain with a wet DCOF around 0.42 or higher balances slip resistance and easy cleaning.
- Walls: Glazed ceramic or porcelain; classic subway profiles reduce cutting complexity and support fast repairs later.
- Shower pans: 2×2 mosaics improve traction and contouring to slopes for smooth drainage.
- Profiles: Aluminum trims at exposed edges reduce chipping and accelerate installs compared with bullnose-only approaches.
Waterproofing assemblies
- Cement board + liquid membrane: Familiar, repairable, and effective when applied to rated thickness with full corner treatment.
- Foam board + sealed seams: Lightweight, fast in walk-ups, and provides integrated vapor control when seams are properly taped and sealed.
- Sheet membranes: Consistent thickness with reliable seams when rolled-in per the manufacturer’s instructions.
Setting and grout systems
- Mortar: Polymer-modified thinset for porcelain; use a medium-bed mortar for tiles 15 inches or larger on any edge to limit sag and lippage.
- Grout: Stain-resistant cementitious or epoxy varieties for high-use showers; typical joint widths range from 1/8 to 3/16 inch.
- Sealants: 100% silicone at all changes of plane; include movement joints at intervals per manufacturer guidance.
For a practical overview of tile installation basics from an established publisher, see this general reference on tile installation methods. While methods vary by product line, the principles above hold for most rental-grade assemblies.
Tile installation guide for rental bathrooms: Step-by-step
Use a 12-step workflow: protect, demo, prep, waterproof, lay out, dry-fit, mix mortar, set tile, maintain joints, cure, grout, and seal. Document slopes, coverage, and flood tests. Standardize SKUs and notes across units to compress timelines and reduce rework.
- Protect common areas: Floor protection, dust barriers, and corner guards keep buildings operational and reduce clean-up time.
- Careful demolition: Cap plumbing, maintain ventilation, and remove old materials without damaging substrates you intend to keep.
- Substrate prep: Correct flatness; patch, plane, and vacuum for strong bond and minimal lippage.
- Backer installation: Fasten per schedule; tape and thinset seams for a continuous plane.
- Waterproofing: Apply liquid or install sheet membranes; reinforce corners, niches, and valve penetrations.
- Layout planning: Strike centerlines; target balanced cuts at walls and avoid slivers in sightlines.
- Dry-fit & trims: Confirm pattern, transitions, and edge profiles to lock in aesthetics and speed setting.
- Mix mortar: Follow proportions and slake time; remix for consistent performance.
- Set tile: Comb in one direction; back-butter large tiles; aim for high coverage in wet zones and proper alignment.
- Movement joints: Maintain joint width; add soft joints at changes of plane and long runs to absorb building movement.
- Cure & protect: Respect open time and protect from foot traffic and moisture exposure during set.
- Grout & seal: Tool joints cleanly; silicone at planes and around fixtures; wipe haze and present a spotless handover.
| Step | Checkpoint | What to Document |
|---|---|---|
| Prep | Flatness, clean surface | Photos of substrate, notes on patching areas |
| Waterproof | Continuous coverage at corners | Wet-film gauge or seam tape photos |
| Set | Tile coverage and alignment | Lift checks, trowel pattern photos |
| Grout | Clean joints, silicone at planes | Detail shots at transitions and fixtures |
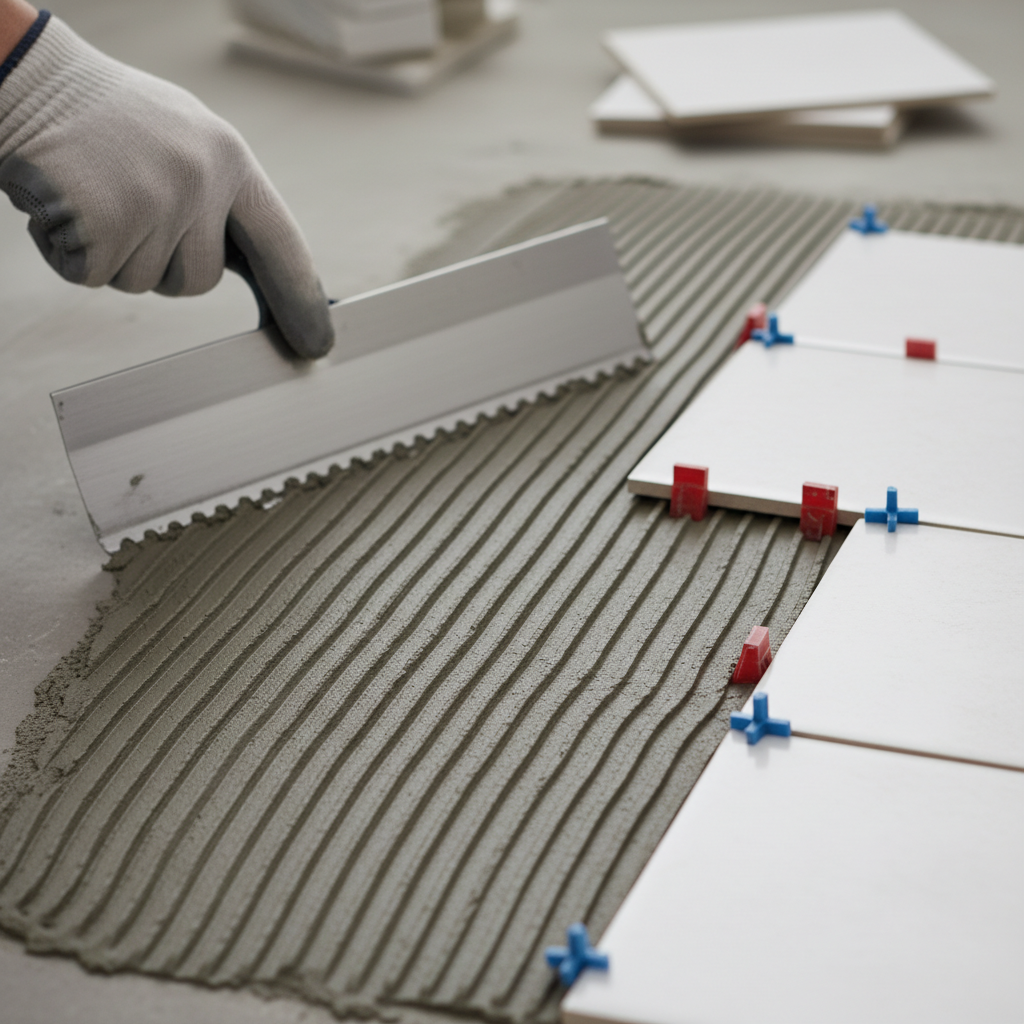
For a quick visual on mortar ridges and coverage, review a close-up of the process below. We organize our carts the same way on every project to keep pacing predictable across multi-unit schedules.
Tools and resources
Equip teams with dust control, measurement tools, cutting systems, and reliable mortars and membranes. Use standardized carts and checklists across buildings so crews can mobilize fast and produce consistent results with fewer errors and less disruption.
- Prep & measure: Laser level, long straightedge, moisture meter, HEPA vac, and protective floor runners.
- Cutting: Snap cutter for ceramics and a wet saw for porcelain to ensure clean, chip-free edges.
- Setting: Notched trowels, mixing drill, buckets, spacers, and leveling clips sized to tile format.
- Waterproofing: Roller or brush, wet-film gauge (for liquids), seam tape tools (for sheets), and corner banding.
- Safety: Respirators rated for silica, eye/ear protection, and ventilation fans to maintain air quality.
- Documentation: Photo app, unit-specific punch lists, material SKUs, and batch numbers for accurate record-keeping.
For portfolio-level coordination that extends beyond bathrooms, our home page outlines full unit turnovers, flooring and tiling, painting and repairs, and responsive emergency services.
Troubleshooting and fast fixes
Most rental tile issues trace to substrate movement, moisture, or joint detailing. Verify coverage, re-seat loose tiles with proper mortar, re-caulk changes of plane with 100% silicone, and address ventilation to prevent recurring grout discoloration or mildew.
- Lippage: Check substrate flatness and trowel size; use leveling clips on large-format tile to even heights.
- Hollow sounds: Usually inadequate coverage; remove and reset with full back-buttering and correct trowel angle.
- Cracked grout: Add soft joints at corners and long runs; confirm deflection meets tile tolerances.
- Discoloration: Improve ventilation and consider stain-resistant grout or penetrating sealers for easier cleaning.
- Leaks: Inspect membrane continuity; repair seams and re-flood test pans before closing walls or installing glass.
Routine cleaning also extends service life. For a simple walkthrough on maintaining grout appearance, see this overview on tile and grout cleaning. Keep in mind: choose products compatible with your grout and sealers.
Best practices for durable rental bathrooms
Standardize finishes, use slip-resistant porcelain, and prioritize continuous waterproofing. Keep movement joints and 100% silicone at plane changes. Document everything—before, during, and after—to speed future repairs and reduce tenant disputes at move-out.
- Standard kits: One floor tile, one wall tile, one trim, one grout color. Fewer SKUs, faster procurement.
- Slip resistance: Target a wet DCOF around 0.42 for floors in showers and bathrooms.
- Maintenance-forward: Specify epoxy or stain-resistant grout in high-frequency cleaning environments.
- QA points: Verify slopes toward drains and measure lippage against tile thickness across transitions.
- Turnover packet: Provide a 1-page care sheet and product list to onsite teams and managers.
| Grout Type | Cleaning Effort | Stain Resistance | Typical Use | Notes |
|---|---|---|---|---|
| Stain-resistant cement | Low–moderate | Improved vs. standard cement | General rental bathrooms | User-friendly, familiar tooling |
| Epoxy | Low | High | High-use showers | Excellent for frequent clean cycles |
| Urethane | Low | High | Selective applications | Flexible and stain resistant |
Need a portfolio-ready tile spec?
We help property managers align materials, methods, and QA checkpoints across buildings. Explore our turnover approach and connect with our team on the Mahal site for a structured, low-disruption plan.
Case studies and examples
Across London and the broader ON region, standard kits and documented checklists shorten turnovers and cut rework. Neutral finishes, silicone at all plane changes, and mosaic shower pans consistently improve tenant acceptance and reduce maintenance callbacks.
Example A — 12-unit turnover: Standardized on 12×24 matte porcelain floors and 4×12 subway walls. After adding silicone at every change of plane, punch-list items dropped and cleaning time at handover improved noticeably.
Example B — Shower pan traction: 2×2 mosaics on pans enhanced traction and made achieving smooth slopes easier, reducing standing water complaints.
Example C — Logistics win: Elevator scheduling and pre-staged materials trimmed crew idle time and protected common corridors, improving resident satisfaction in occupied buildings.
For additional multi-trade sequencing tips that complement bath tiling, our write-up on remodel timelines outlines practices that also stabilize bathroom schedules during full unit turnovers.
Local considerations for London
- Plan around winter humidity swings that stress grout and caulk; schedule re-caulking during the driest weeks for better adhesion.
- Coordinate quiet hours in multi-unit buildings during cutting and demo to reduce disruption for residents.
- Stage protection in common corridors and near elevators to maintain safe access while crews move materials.
Frequently Asked Questions
Managers ask about tile types, grout choices, timelines, and repair approaches. Favor porcelain for floors, stain-resistant grout, and silicone at movement joints. With prepared substrates and rapid-setting materials, many bathroom tile scopes finish within a few working days per unit.
What tile is best for rental bathroom floors?
Matte porcelain with a wet DCOF around 0.42 balances slip resistance and cleanability. Standardizing one SKU across your portfolio simplifies procurement, touch-ups, and future replacements.
How do I prevent grout cracking?
Maintain movement joints at corners and long runs, and use 100% silicone at all changes of plane. Ensure proper mortar coverage and verify the substrate supports tile per manufacturer tolerances.
Do I need to waterproof behind tile?
Yes—tile and grout are not waterproof. Use a continuous membrane behind or under tile in wet zones, paying special attention to seams, corners, niches, and shower valve penetrations.
Key takeaways
Choose porcelain, continuous waterproofing, and stain-resistant grout. Standardize layouts and materials, document each step, and protect common areas. These choices reduce callbacks and accelerate rent-ready timelines across multi-unit properties.
- Porcelain for floors; classic subway for walls to simplify stocking and repairs.
- Continuous membrane and silicone at all plane changes and penetrations.
- Document slopes, coverage checks, and flood tests for QA and future service.
- Standardize SKUs and finishes across buildings to move faster with fewer errors.
Conclusion and next steps
Standardized tile specs transform rental bathrooms into durable, easy-to-clean spaces that turn faster. Align teams on materials, methods, and checkpoints, then repeat across units for predictable outcomes and fewer maintenance calls throughout your portfolio.
Need portfolio-ready specs and execution? Our London-based, WSIB-compliant crews deliver full unit turnovers, bathroom and kitchen remodeling, flooring and tiling, painting and repairs, and emergency stabilization—built around safety compliance and predictable timelines. Review our approach on the Mahal Concrete and Constructions site or connect via our contact and policy page for next steps.