Paint and repairs before tenant move in is the standardized refresh and fix phase between move-out and re-leasing so a unit is clean, safe, and truly move-in-ready. Based at 805 Chelton Rd in London, ON, our team delivers repeatable paint-and-repair scopes that shorten vacancy and set up a smooth next lease term.
By Mahal Concrete and Constructions | Last updated: 2026-06-02
Above-Fold Hook + Table of Contents
Ready units lease faster. A disciplined paint-and-repair turnover creates a neutral, durable canvas and removes maintenance risks before keys change hands. Use this complete guide to scope, standardize finishes, and hand over apartments that pass quality checks and make great first impressions.
Here’s the thing: curb appeal continues inside the door. Fresh paint, tight caulk lines, and silent doors tell a resident you care. This guide shows multi-unit teams how to standardize turnovers without slowing schedules.
- What paint and repairs before tenant move in includes
- Why standardizing finishes reduces vacancy across portfolios
- Step-by-step turnover workflow our crews run at scale
- Methods, materials, and tools that last in high-traffic units
- Real London, ON case examples (bath, kitchen, full-unit)
- FAQs property managers ask before handover
Summary
Pre-move-in paint and repairs combine a neutral repaint with targeted fixes so the unit is safe, clean, and presentable on day one. Standardizing colors, materials, and checklists shortens vacancy windows, streamlines scheduling, and makes quality control faster across buildings and unit types.
- Turnovers typically include full-unit painting, drywall patching, re-caulking, fixture swaps, and hardware tune-ups.
- Standardized finishes speed up future touch-ups and new turns.
- A structured workflow protects schedules in occupied properties.
What Is “Paint and Repairs Before Tenant Move-In”?
Paint and repairs before tenant move in is a structured refresh performed after move-out and before re-leasing. It blends whole-unit painting with targeted maintenance—wall patching, caulking, hardware checks—so the apartment is clean, functional, and consistent at handover.
In our experience turning 500+ apartments across Southwest Ontario, the best results come from a standardized scope. That means the same paint system, caulk, and hardware SKUs across buildings; the same inspection checklist; and clear pass/fail criteria your team can apply in minutes.
- Core painting scope: neutral color, eggshell or satin walls, semi-gloss trim/doors, two coats minimum, with primer where needed.
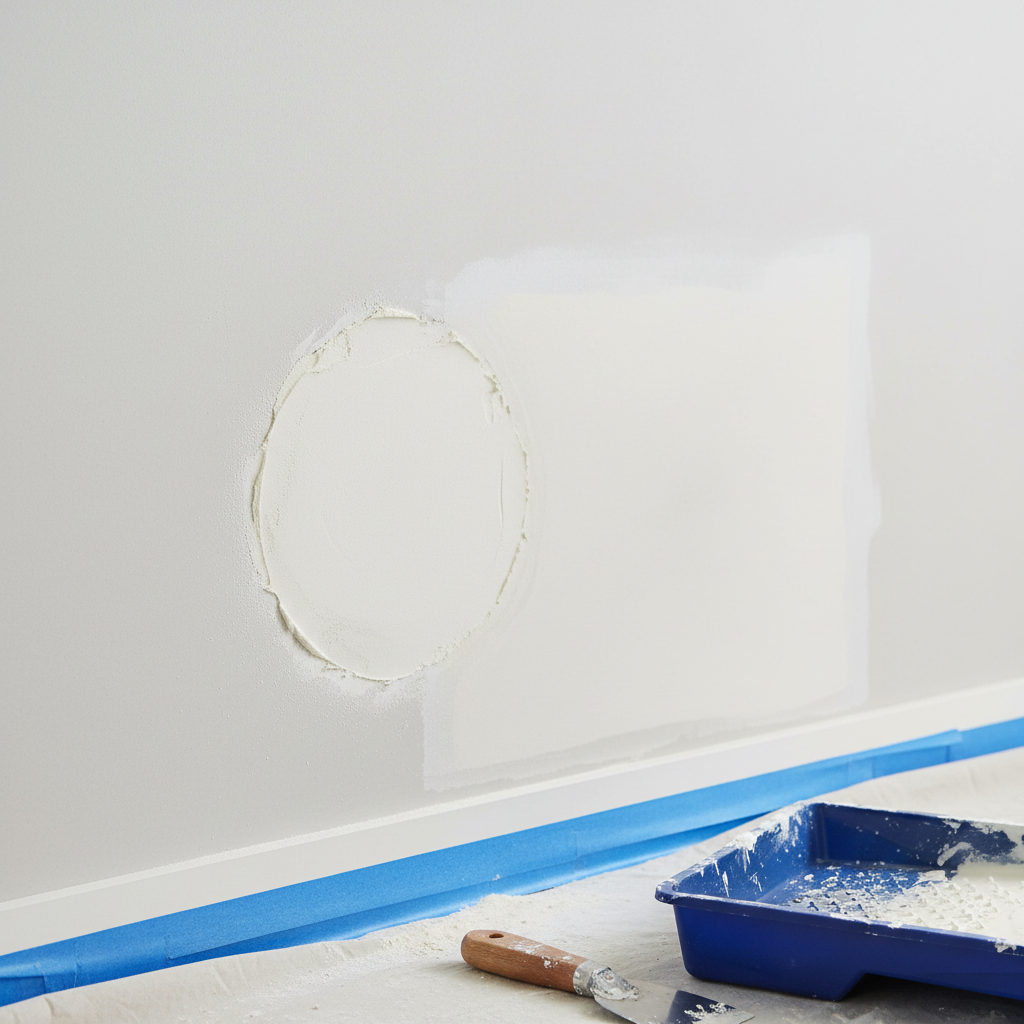
- Wall repairs: dents, nail holes, corner bead damage, water-stain sealing, and tape seam cracks repaired and sanded smooth.
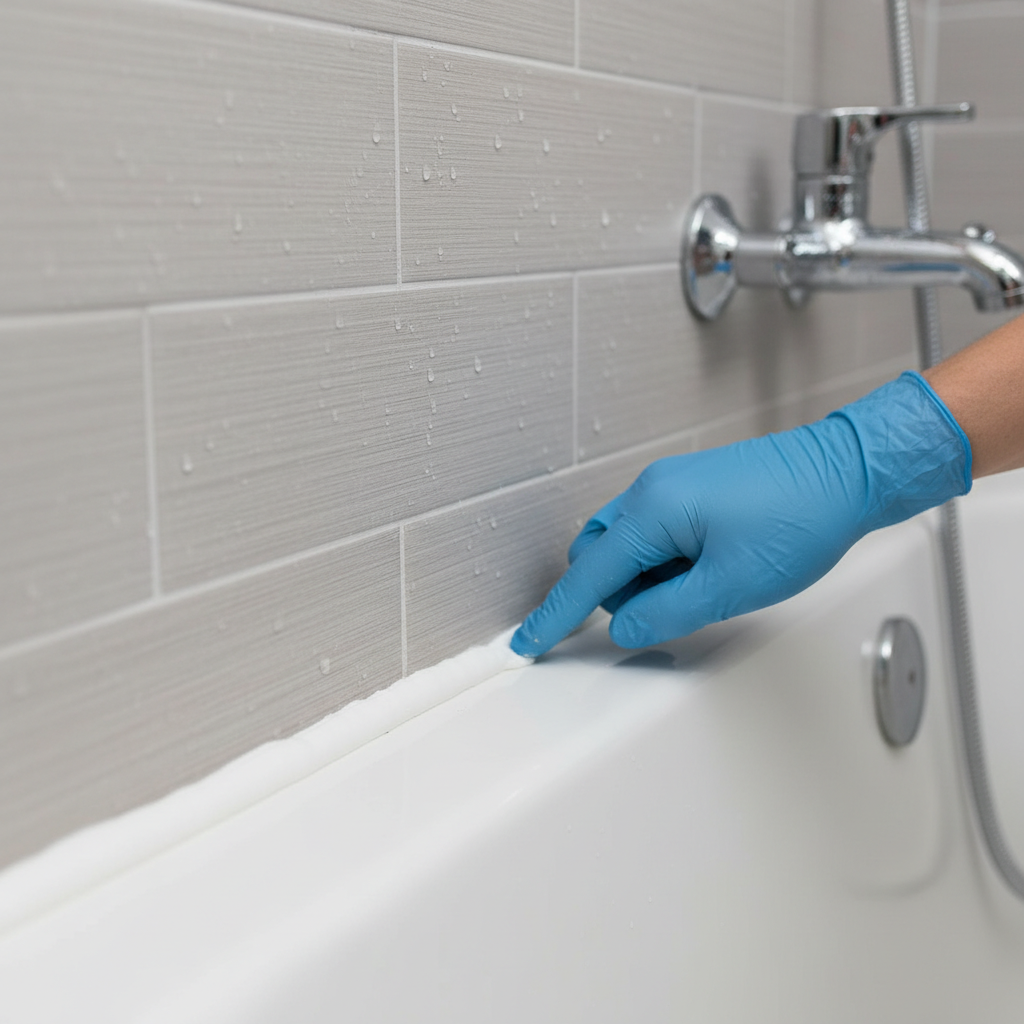
- Moisture controls: tub and vanity re-caulking, grout touch-ups, and exhaust fan checks to keep humidity in check.
- Hardware tune-ups: door stops, latches, cabinet hinges, and loose handles tightened and aligned.
- Surface finishing: deep clean, vent cover wipe-downs, and switch/plate checks so details look cared for.
Why it matters: the first 90 seconds in a showing set expectations. Smooth walls and consistent sheen photograph better, reduce complaints, and help you lease faster to the right resident profile. If you’re building your process, our turnover scope template is a useful starting point.
Why It Matters for Property Managers and Owners
Turnkey units shorten vacancy and reduce service tickets. Standardized paint-and-repair scopes lower rework, control materials inventory, and make scheduling predictable for multi-property teams handling dozens of turns each month.
For London portfolios, one missed detail—a peeling tub bead or scuffed entry wall—can trigger avoidable move-in requests. We’ve found unit-ready consistency reduces post-move-in callbacks, protecting your team’s time when multiple turnovers overlap. That’s a big reason our clients adopt a single spec for all buildings.
- Portfolio velocity: Consistently prepared units support back-to-back showings without emergency fixes or last-minute paint touch-ups.
- Brand consistency: The same color, hardware feel, and clean lines across properties build resident trust and reduce decision friction.
- Risk reduction: Moisture control and safe hardware reduce incident exposure between tenants and help preserve finishes.
- Leasing impact: Fresh paint and aligned sheens improve listing photos and walk-through impressions across channels.
Our standardized finishes approach aligns with schedule-driven delivery and WSIB-compliant practices in occupied properties, minimizing disruption while work proceeds on adjacent units. For common missteps to avoid, review our apartment turnover mistakes guide.
How a Professional Paint-and-Repair Workflow Works
A professional turnover follows a checklist-driven sequence: assess, scope, prep, repair, paint, moisture control, quality check, and handover. Each stage has pass/fail criteria, assigned roles, and photo documentation so the unit is clean, safe, and consistent before leasing.
Below is the operational flow our crews follow for multi-unit properties in London and nearby markets. It integrates with our unit inspection process and handover quality check.
- Site assessment: Document wall damage, moisture points, and fixture conditions; capture full-room photos for baseline reference.
- Scope finalization: Confirm repaint areas, repair types, and materials per your standard spec; align on sequence and team roles.
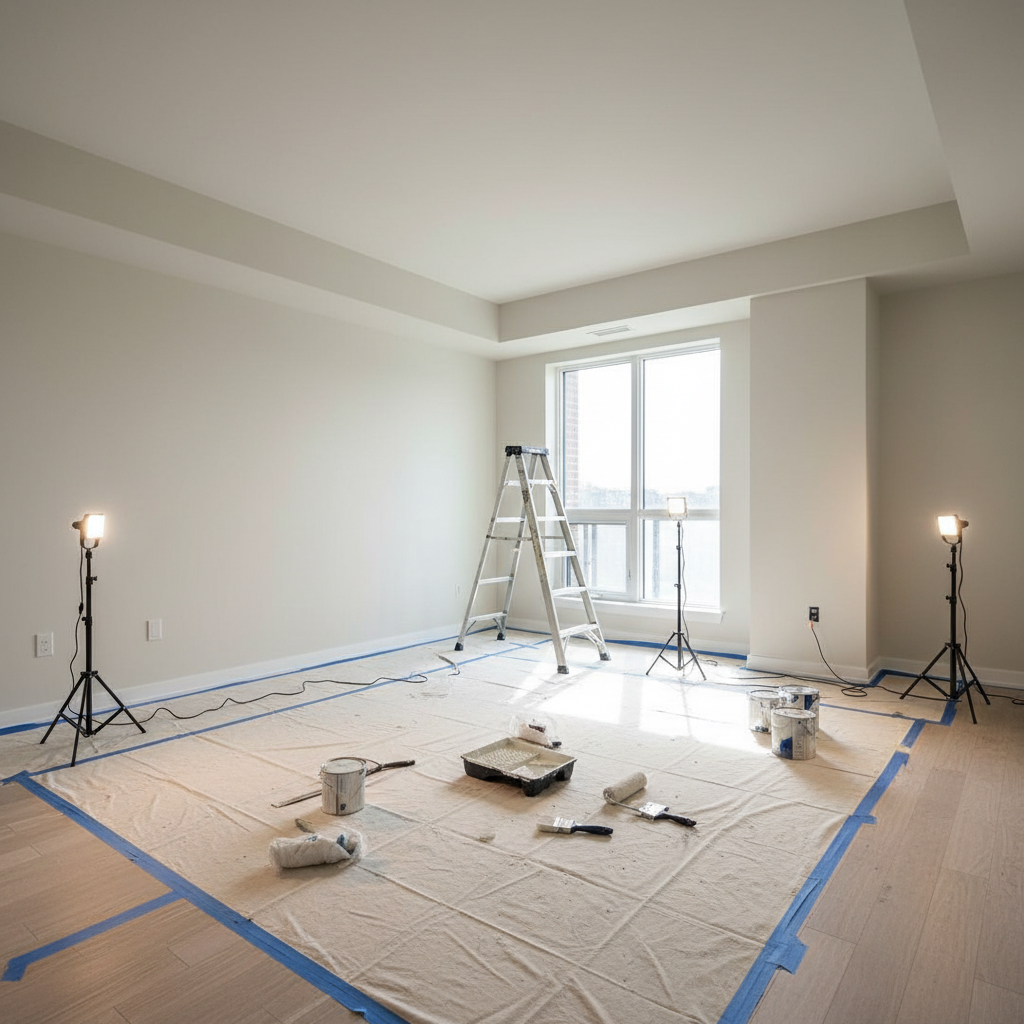
- Surface prep: Protect floors, remove cover plates, clean walls, degloss trim where needed, and spot-prime stains for adhesion.
- Repairs: Patch, sand, re-tape seams, replace damaged corner beads, and set protruding nails/screws flush.
- Paint: Cut and roll two coats; spray doors/trim where allowed for a uniform finish; verify consistent sheen and color match.
- Moisture control: Remove failed caulk, treat minor surface mold, apply new 100% silicone in wet areas, and verify exhaust fan operation.
- Hardware tune-ups: Tighten hinges, stops, and latches; align cabinet doors and drawer fronts; ensure silent closure.
- Quality check: Punch-walk with angled light; photo-document pass/fail points; correct any visible defects immediately.
- Clean and handover: Reinstall plates, vacuum thoroughly, wipe hard surfaces, and update the turnover log for leasing.
| Stage | Main Tasks | QC Signal |
|---|---|---|
| Assessment | Photos, moisture checks, damage map | Complete photo set stored |
| Prep | Masking, cleaning, degloss, spot-prime | No dust; crisp tape lines |
| Repairs | Patch/feather, sand, re-tape seams | Seamless texture at 45-degree light |
| Paint | Two wall coats; trim/doors finish | Uniform sheen; no lap marks |
| Moisture | Re-caulk tub/vanity; grout touch-ups | Even silicone bead; no gaps |
| QC + Clean | Punch list, wipe-downs, reinstall | Zero visible defects on walk |
Tip: Photograph repairs before priming and after final paint. That record speeds warranty calls and protects move-in documentation. For a full turnover overview, see our unit turnover checklist.
Types, Methods, and Approaches We Use at Scale
Scaled turnovers rely on standard specs—neutral color systems, durable sheens, repeatable repairs, and moisture control. Using the same paint line and hardware SKUs, crews move faster, and quality checks become predictable across buildings and portfolios.
Painting methods that save time and hold up
- Neutral palette: Light warm-gray walls with white trim/doors increase light bounce and keep touch-up blending simple.
- Durable sheens: Eggshell or satin for living areas; semi-gloss for kitchens, baths, and trim where cleaning is frequent.
- Cut-and-roll workflows: Two-person teams maintain wet edges and reduce lap marks for a smoother finish.
- Priming strategy: Stain-blocking primer on water marks and patches prevents flashing and sheen mismatch.
Repair categories we prioritize
- Walls: Holes and dings filled, corner bead damage replaced, tape cracks reworked with setting compound.
- Cabinets: Hinge alignment, handle tightening, and drawer slide lubrication to restore smooth function.
- Tile and grout: Minor re-grouting where needed; replace failed silicone at tubs, showers, and backsplashes.
- Hardware safety: Secure door stops and latches; confirm smoke/CO device mounts are sound.
Local considerations for London
- Seasonal humidity swings can show seam lines. Plan sanding and painting windows to allow proper curing during spring and fall.
- Winter turnovers benefit from low-VOC products and a ventilation plan that doesn’t overtax heating in ON buildings.
- Portfolio rhythm matters. Align unit scopes with your leasing calendar to reduce vacancy overlap during London peak move months.
Standardization isn’t rigid; it’s deliberate. Crews know the spec, and deviations are documented when surprises appear behind paint or tile. For wall surface prep details, our guide to wall repairs and patchwork explains the approach we use before final coats.
Best Practices for Fast, Consistent Turnovers
The fastest turnovers win on preparation, sequencing, and QC. Protect floors, fix walls before paint, control moisture at tubs and sinks, and perform punch-walks under angled light. Document every stage so leasing and maintenance stay aligned.
Sequencing that protects finish quality
- Start with repairs before any paint is opened.
- Prime patched areas to avoid sheen flash-through.
- Paint ceilings → walls → trim/doors in that order.
- Install hardware after the final coat is dry to the touch.
Materials we trust for high-traffic units
- Washable paints in eggshell or satin for walls that can handle regular wipe-downs.
- 100% silicone in wet areas; paintable acrylic latex for dry gaps where needed.
- Setting-type joint compound for fast, strong patches that sand cleanly.
Quality checks that actually catch issues
- Use a side light at 45 degrees to spot roller lines or sanding ridges.
- Run a fingertip test along caulk beads; they should feel continuous with no voids.
- Door sweep test: Close doors to confirm silent latching and no rub on floors.
If you’re coordinating several units, align these checks with your leasing team’s photo schedule. Clean, even sheens read better on camera, improving listing performance. Before handover, use our handover QC checklist to make the final pass objective and quick.
Tools, Resources, and Helpful References
Use a standard kit for every turnover: patching tools, low-VOC paints, silicone, sanders, inspection lights, and a digital checklist. Keep spec sheets and safety data handy. When cabinets are sound, refinishing resources help you choose repaint vs. replacement.
- Digital turnover checklist: Scope, photos, pass/fail items, timestamps, and signatures.
- Lighting: Handheld side light for wall inspection; consistent bulb color for the final look.
- Repair kit: Joint compound (fast-set), knives, sanding blocks, corner beads, and dust control tools.
- Painting kit: 3/8-inch nap rollers, angled brushes, and a spray setup for doors/trim where feasible.
- Moisture control: Silicone, grout tools, disinfectant, and exhaust fan checks.
For a practical look at cabinet refinishing workflows, see cabinet refinishing preparation, how to choose pro vs. DIY refinishing, and post-work aftercare for refinished cabinets. These resources clarify when repainting makes sense versus a full replacement.
Repair vs. Replace: Quick Comparison for Common Decisions
Repair when defects are local, structure is sound, and finishes can blend. Replace when damage is widespread, safety is in question, or blending will telegraph flaws. Write these thresholds into your spec so site teams decide fast without escalations.
| Component | Repair If | Replace If | Notes |
|---|---|---|---|
| Walls | Holes/dings under 3 inches; small tape cracks | Large water damage; mold; failed drywall sections | Seal stains before finish coats |
| Doors/Trim | Scuffs/scratches; minor chips | Warped; delaminated; broken | Spray for a uniform finish when feasible |
| Cabinets | Sound boxes; worn faces | Rot; loose boxes; failed slides | Refinish or swap fronts if boxes are solid |
| Tile/Grout | Isolated grout cracks; intact tile | Loose tiles; spongy substrate | Re-caulk wet joints with 100% silicone |
| Caulk | Gaps or discoloration | Black staining; failed adhesion | Remove thoroughly before re-caulking |
Consistent decisions accelerate schedules and protect finishes. If you’re unsure, our full unit turnover guide outlines where quick repairs win and when upgrades make more sense.
Case Studies and Real-World Examples (London, ON)
Small, repeatable wins across units drive big portfolio results. These brief examples show how standard specs, checklists, and quick repair-vs.-replace decisions keep turnovers on schedule and listings looking fresh.
Studio repaint with bath moisture reset
- Scope: Full-unit paint; tub and vanity re-caulking; exhaust fan verification.
- Approach: Spot-primed previous water stains; used 100% silicone at wet joints; verified air movement.
- Outcome: Fewer moisture-related tickets after move-in; brighter photos across listing platforms.
One-bedroom kitchen tune-up
- Scope: Neutral repaint; hinge alignment; handle replacements; drawer slide lubrication.
- Approach: Doors sprayed for a flawless finish; boxes cleaned and kept; hardware standardized.
- Outcome: Kitchen read “like new” without cabinet replacement; strong showing feedback.
Family unit wall restoration
- Scope: Multiple drywall patches; corner bead replacement; full repaint with sheen alignment.
- Approach: Setting compound for speed; aggressive side-light QC to perfect texture.
- Outcome: Seamless walls at handover; no schedule slips despite heavy repairs.
Across these examples, the constant was a standard spec and a clean handoff checklist. That’s how multi-unit teams scale without sacrificing appearance or safety. For a holistic view, explore our portfolio turnover checklist.
London, ON Context and Compliance Notes
In London, ON, turnover work benefits from clear scopes, safety-first execution, and neutral finishes that photograph well. Plan around seasonal humidity and heating cycles, and maintain documentation for work completed during each unit’s vacancy window.
- Schedule repairs and painting to allow proper cure times when humidity swings are widest.
- Keep a unit-level turnover log with dates, materials, and photo evidence of repairs and paint.
- Coordinate with leasing so marketing photos occur after final QC and cleaning.
If a unit presents unusual legal or procedural questions, discuss them with your property manager or legal advisor. For cabinet refinishing decisions and maintenance planning, the resources linked in Tools and Resources clarify preparation, execution, and aftercare.
Frequently Asked Questions
Managers ask similar questions during turnover season. These concise answers cover scope, timing, materials, and how to decide on repair vs. replacement so units look great on listing day and hold up after move-in.
What’s included in paint and repairs before tenant move in?
A typical scope covers a neutral full-unit repaint, drywall patching and sanding, re-caulking tubs and sinks, minor grout touch-ups, hardware tightening, and a final punch-walk. We also deep clean touch points and reinstall plates before handover.
How long should paint dry before a new tenant moves in?
Most interior paints dry to the touch within hours. We schedule walkthroughs after paint is dry and odors have dispersed, then protect new finishes during cleaning and hardware installs. Final cure hardens over several days, so we use washable finishes that resist early scuffs.
When should I replace cabinets instead of repainting?
If cabinet boxes are sound, refinishing or swapping doors can deliver a fast refresh. Replace when boxes are water-damaged, out of square, or hardware mounting points fail. We evaluate each kitchen against the turnover spec to decide quickly.
How do you keep turnovers quiet in occupied buildings?
We use tenant-friendly scheduling, contain dust and odors, and sequence noisy work during agreed windows. Corridors stay clean, doors close softly, and tools are staged neatly. Clear signage and a tidy site reduce disruption while we work.
Conclusion
A repeatable paint-and-repair turnover makes units show-ready, reduces callbacks, and protects schedules. Standardize your spec, enforce QC, and document the work. That’s how portfolios shorten vacancy and deliver a consistent resident experience across buildings.
- Define a standard paint-and-repair spec for every unit type.
- Sequence: prep → repairs → paint → moisture control → QC → clean.
- Use durable, washable finishes and 100% silicone in wet areas.
- Photo-document each stage for quality assurance and leasing.
Need to align multiple unit handovers? Schedule a quick turnover assessment with our London team. We’ll map a standard spec for your buildings and coordinate a schedule-driven plan.
Related Articles
Want to go deeper on apartment turnovers and upgrades? Explore topics like pre-handover inspections, kitchen refresh strategies, and emergency stabilization planning to strengthen your readiness playbook.
- Full unit turnover checklists for apartment owners
- Kitchen refresh vs. replacement aligned with leasing calendars
- Emergency stabilization protocols during active turnovers
- Quality control steps before you hand over keys
For more portfolio-focused tips, see our guides on avoiding turnover delays and inspecting a unit before turnover. Pair them with our final QC checklist so every handover is clean and consistent.