
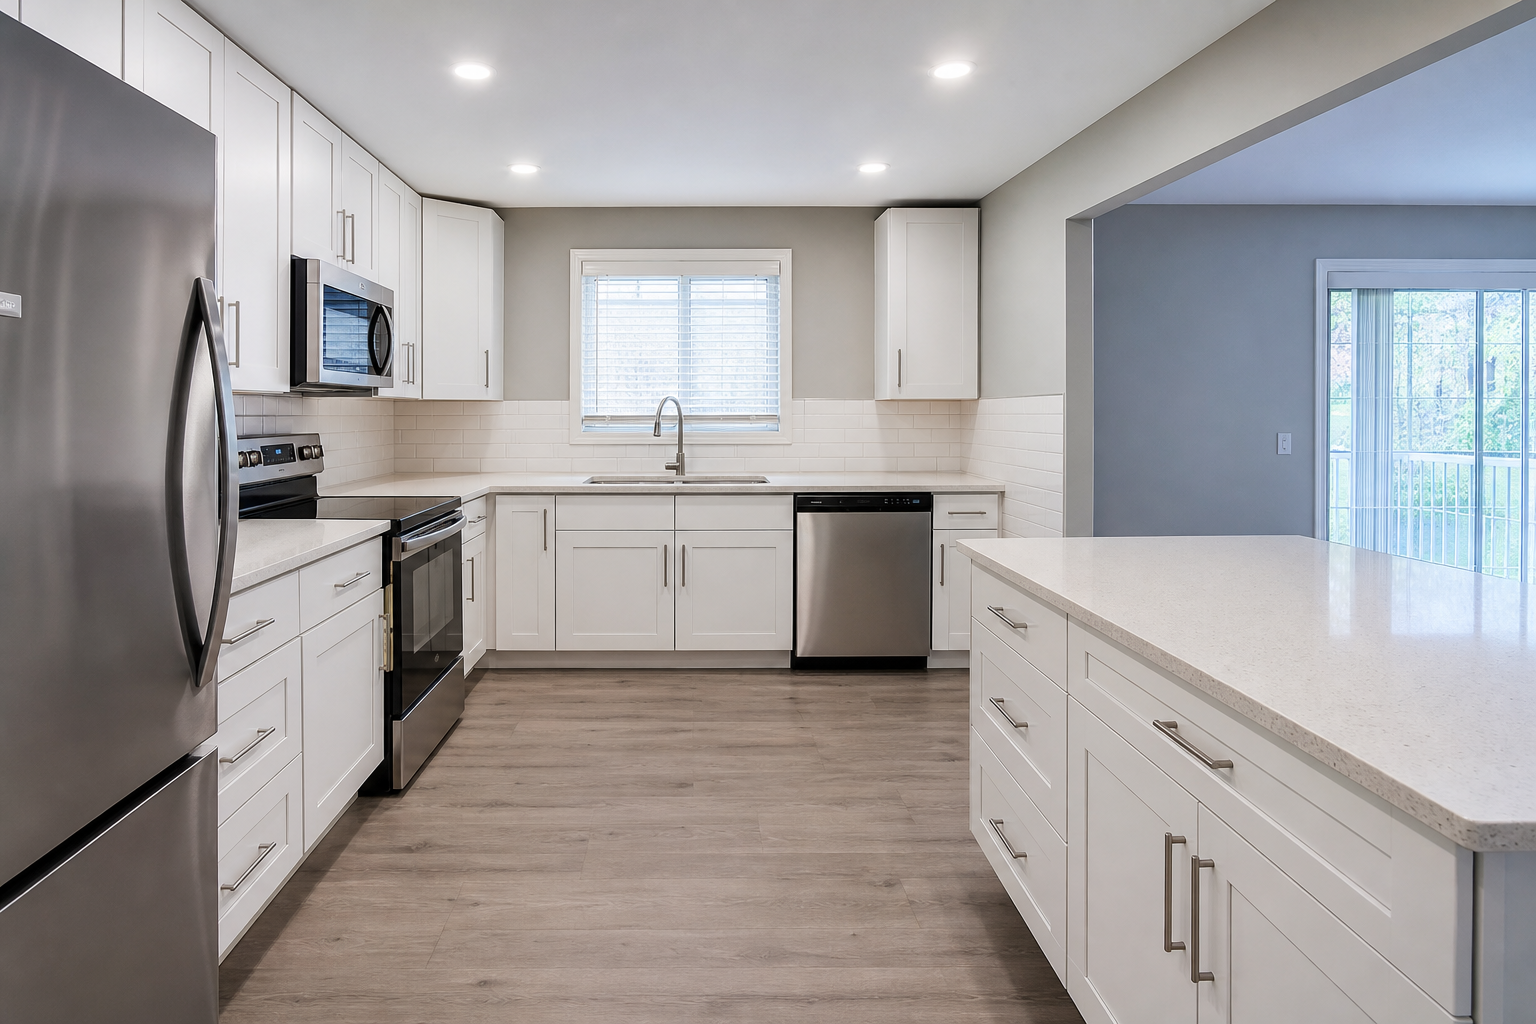

A Practical Guide to Kitchen Remodelling for Apartment Turnovers
Apartment kitchen remodelling during unit turnovers demands a balance of speed, durability, and consistency. Property managers and landlords need an approach that scales across multiple units, minimizes vacancy days, and produces a clean, move-in-ready result tenants can trust. This guide offers a practical framework—from scope definition through handover—so you can plan and execute reliable, repeatable kitchen upgrades that fit portfolio needs.
Set clear turnover goals and scope
Successful turnover remodels start with a tight scope and measurable goals. Define exactly what you want the remodel to accomplish and what success looks like at handover. Then align stakeholders and trades on the scope so the project can move in a straight line, even if you’re executing across many units.
- Objectives: reduce vacancy days, standardize finishes, upgrade durability, fix recurring maintenance issues.
- Scope options: refresh (paint, hardware, minor repairs), partial remodel (cabinets or countertops, sink/faucet, backsplash), full remodel (layout tweaks, cabinets, counters, flooring, lighting, appliances).
- Decision drivers: current condition, recurring work orders, tenant expectations, building age, budget, and timeline.
- Deliverables: final punchlist cleared, surfaces clean, appliances functional, manuals and keys tagged, photos logged.
Document the scope in a single source of truth with unit identifiers, measurements, selections, and any constraints (e.g., elevator access, quiet hours, staging areas).
Standardize specs for scale
Standardization reduces decision fatigue, speeds procurement, and ensures consistent results across units. Create spec packages that can cover 80–90% of scenarios, with limited, preapproved variations for atypical layouts or legacy conditions.
- Cabinetry: choose a stock line and stick to two or three colors. Predefine box sizes and fillers to fit common wall lengths.
- Countertops: select a durable, low-maintenance surface in one standard profile and thickness. Keep a backup colorway for stock gaps.
- Hardware: one finish across units (e.g., brushed nickel or matte black) with two handle lengths to suit drawers and doors.
- Sink and faucet: standardized bowl size, gauge, and faucet style with a matching finish and included supply lines.
- Backsplash: a single tile SKU and grout color to streamline installation and reduce leftover stock.
- Flooring: consistent, water-resistant product rated for high traffic, carried in bulk with matching transitions.
- Paint: one wall color, one trim color, one sheen for walls and one for trim/doors; label cans by unit and date.
- Lighting: standard LED fixtures with warm-neutral color temperature; specify lumen targets for task and ambient zones.
- Appliances: a consistent size suite to fit pre-set cabinet openings and avoid last-minute carpentry changes.
Keep a spec sheet with SKUs, supplier contacts, lead times, and alternates. When a primary SKU is unavailable, switch only to documented alternates to maintain portfolio consistency.
Optimize layout and function
In apartments, space is tight and function matters. Small layout improvements can raise tenant satisfaction and reduce wear-and-tear. Prioritize clear work paths and storage density without triggering unnecessary structural moves.
- Work zones: prep near the sink, cooking near the range, and storage near the fridge. Keep uninterrupted counter spans where possible.
- Clearances: doors and drawers should open fully without clashing; allow comfortable passage even with oven or dishwasher open.
- Storage: add vertical cabinetry, pull-out trays for base cabinets, and a tall pantry cabinet where space permits.
- Lighting: combine ambient ceiling lights with under-cabinet task lighting to brighten counters and improve safety.
- Ventilation: provide effective hood or microwave-hood ventilation to reduce moisture and cooking residues.
- Power and water: allocate outlets for countertop appliances and ensure shut-off valves are accessible and labeled.
When reconfiguring layouts, verify appliance dimensions, door swings, and service clearances against cabinet plans before ordering.
Choose durable, low-maintenance materials
Turnovers reward materials that handle high traffic and routine cleanings. Evaluate products based on lifecycle cost, not just upfront price.
- Cabinets: moisture-resistant boxes with durable finishes; favor simple door profiles that clean easily.
- Counters: hard-wearing, stain-resistant surfaces; use factory-finished edges to avoid field variability.
- Flooring: water-resistant, scratch-resistant options with manufacturer-rated wear layers; standardize transitions.
- Tile: porcelain or ceramic with mid-tone grout to hide wear; specify edge trim for clean termination.
- Plumbing fixtures: metal bodies with ceramic cartridges; stock identical replacement aerators and cartridges.
- Paint: scrubbable finishes in neutral colors; maintain a touch-up log tied to batch numbers.
- Hardware and lighting: finishes that resist fingerprints and corrosion; LED fixtures with replaceable drivers or common SKUs.
Maintain a labeled inventory of touch-up kits, spare handles, and extra tiles for future repairs, logged by unit and date.
Sequence the work to reduce vacancy days
A tight sequence cuts idle time and confusion. Map your schedule to the building’s access rules and the availability of materials before work begins.
- Pre-move-out prep: measure, verify utilities, photograph existing conditions, and finalize selections.
- Day 1: protect floors in travel paths, remove appliances and old finishes, and cap plumbing/electrical as needed.
- Day 2–3: rough carpentry and wall repairs; patch and sand to paint-ready condition.
- Day 4: cabinet install; confirm level and plumb, set fillers and panels.
- Day 5: countertop templating (or install if pre-cut); schedule sink cutouts and faucet drilling.
- Day 6: plumbing set, appliance placement, and electrical device install; verify GFCI placements where applicable.
- Day 7: backsplash tile and grout; final paint touch-ups.
- Day 8: flooring and transitions; baseboards and caulking.
- Day 9: punchlist walk, corrections, deep clean, and photo documentation.
Adjust the sequence to match lead times—e.g., if countertops require fabrication time, advance-fill the gap with other tasks (backsplash prep, paint, or flooring) to avoid idle calendars.
Coordinate trades and access
In multi-unit environments, logistics can make or break a schedule. Focus on trade handoffs and site access so work flows without surprises.
- One-page daily plan: list tasks, crew names, unit numbers, and material deliveries with time windows.
- Handoffs: confirm when the space is ready for the next trade with sign-offs (e.g., walls closed and painted before cabinets).
- Staging: designate material drop zones away from occupied corridors; label pallets by unit.
- Elevator and parking: pre-book slots for deliveries and heavy items; map the shortest protected path to the unit.
- Noise and dust: use dust barriers and negative air where needed; schedule loud tasks within allowed hours.
- Waste: plan for bin placement, recycling rules, and daily removal to keep paths clear.
Control costs with templates and allowances
Cost control is easier when repeatable elements are baked into your documents. Templates reduce ad hoc choices that cause overruns.
- Unit templates: standard cabinet layouts for common kitchens (galley, L-shape, small U-shape) with fixed SKUs.
- Allowances: set capped allowances for appliances, lighting, and hardware; swap only with documented approvals.
- Change control: a one-page change order with reason, cost/time impact, and sign-off keeps scope drift in check.
- Batch purchasing: buy repeat-use items in bulk to reduce per-unit cost and delivery delays.
- Damage reserve: keep a small contingency for patching or unforeseen substrate issues.
Quality control and punchlist
Turning over a kitchen quickly is only helpful if the work passes a critical eye. Use a consistent checklist before you schedule marketing photos or showings.
- Surfaces: no scratches, gaps, or overcuts; caulk and paint lines are straight and continuous.
- Cabinetry: doors aligned, soft-close functional, fillers flush, scribe molding tight to walls.
- Countertops: level, seams tight, faucet and accessory holes clean; sink sealed with uniform bead.
- Backsplash: tile aligned, consistent joints, grout haze removed, edges trimmed or capped.
- Flooring: transitions secure, thresholds even, no soft spots, expansion gaps concealed per spec.
- Plumbing: no leaks at supply lines or traps; hot/cold orientation correct; shut-offs accessible and labeled.
- Electrical: devices secured and labeled as needed; lighting operational; covers straight.
- Appliances: installed per spec, anti-tip brackets set where required, manuals bagged.
- Cleanliness: cabinet interiors vacuumed, counters disinfected, floors mopped, debris removed.
- Documentation: before/after photos, serial numbers, paint codes, and a dated turnover checklist.
Risk reduction and safety basics
Even short-turnover projects involve risk. Keep simple controls in place to protect people and property.
- Utilities: confirm power circuits and water shut-offs before demolition; lock-out where applicable.
- Containment: seal work areas to limit dust migration; protect elevators and common areas.
- Moisture: inspect for hidden leaks or soft flooring; dry and repair substrates before covering.
- Fasteners and fixtures: verify stud locations for cabinets and heavy items; use appropriate anchors.
- Documentation: photograph concealed work before it’s closed; save product data sheets and warranties.
Communication and visibility
Clear communication prevents confusion and repetition. A simple cadence keeps everyone aligned without micromanagement.
- Kickoff brief: share scope, drawings, specs, and rules with all trades before site work begins.
- Daily update: a short message with what’s complete, what’s next, and blockers; attach photos.
- Milestone checks: cabinet set, countertop install, and final clean are good times for quick walkthroughs.
- Handover packet: include the final checklist, photos, serials, paint codes, and a dated sign-off.
Documentation that scales
Portfolio consistency depends on reliable documentation. Keep everything simple, searchable, and standardized.
- Unit sheets: one per unit with measurements, layout type, and photos.
- Spec index: master list of approved SKUs and alternates with links and lead times.
- Punch templates: one checklist used across all jobs; revise only when materials change.
- Photo protocol: before, during, after, plus close-ups of valves, shut-offs, and under-sink traps.
- Maintenance notes: stock replacement parts and touch-up items tied to each spec.
Turnover kitchen checklist
Use this condensed checklist to guide day-to-day execution:
- Confirm scope, selections, and measurements; order materials and alternates.
- Protect paths; demo and dispose; cap utilities safely.
- Repair substrates; prime and paint to standard colors.
- Install cabinets; level and secure; fit fillers and trim.
- Template/install counters; set sink; seal penetrations.
- Rough-in and set plumbing/electrical devices; test.
- Install backsplash; grout; remove haze; caulk edges.
- Lay flooring and transitions; set baseboards.
- Fit appliances; verify clearances and safety brackets.
- Complete punchlist; deep clean; document and sign off.
FAQs
What should I prioritize if time is limited?
Focus on visible, high-touch elements that impact daily use and first impressions: cabinet doors and hardware alignment, countertop condition and sealing, clean and functional sink and faucet, reliable lighting, and a fresh paint job. Ensure all appliances work and the space is thoroughly cleaned before showings.
How do I keep multiple unit remodels consistent?
Adopt standard spec packages with limited alternates, reuse cabinet layout templates for common kitchen shapes, and maintain a single punchlist format across all units. Batch-purchase repeat items, label everything by unit, and store documentation and photos in a shared, searchable folder structure.
When is a full remodel worth it over a partial refresh?
Consider a full remodel when cabinets are failing, layouts block basic function, or recurring maintenance costs exceed the cost of replacement over a realistic timeframe. If surfaces are sound and the layout works, a partial refresh—new counters, hardware, faucet, lighting, and paint—can deliver strong results with less downtime.
How should I plan for lead times on countertops and cabinets?
Lock selections early, confirm stock with suppliers, and build lead times into your schedule. If countertops require fabrication after templating, plan parallel tasks—backsplash prep, paint, or flooring—so the unit continues progressing while you wait.
What documentation should be in the handover packet?
Include the final checklist, before/after photos, appliance serial numbers, paint codes and sheens, product SKUs, and any fixture manuals. Add notes on shut-off valve locations and recommended cleaning products to reduce future service calls.