A full unit turnover checklist is a step-by-step plan to restore a rental to move-in-ready between tenants. From our base at 805 Chelton Rd in London, ON, Mahal Concrete and Constructions sequences assessment, repairs, upgrades, cleaning, and QA so vacancies shrink and apartments rent faster across Southwest Ontario.
By Mahal Concrete and Constructions • Last updated: 2026-06-07
Quick Summary
A full unit turnover checklist organizes the handoff between tenants into clear phases: assess, scope, schedule, execute, and verify. Standardized finishes, durable materials, and tight coordination compress timelines from weeks to days, creating a clean, safe, move-in-ready unit that re-lists quickly and protects long-term asset value.
This practical, field-tested guide shows how to plan, execute, and quality-check an apartment turnover end to end. You’ll find step-by-step instructions, a printable checklist, comparison guidance, and London, ON considerations for occupied multi-unit buildings.
- Clear definition and why checklists matter for multi-family assets
- How the 5-phase turnover process works in practice
- The complete, printable full unit turnover checklist
- Timeline cues, QA gates, and documentation tips
- DIY vs contractor vs multi-unit specialist comparison
- Buyer’s guide for selecting a turnover partner
- Mini case studies based on portfolio work
Overview and Table of Contents
Use this table of contents to jump to the step you need now. Each section is a self-contained unit with a 40–60 word summary, action steps, and examples. Bookmark this page and share it with on-site staff and leasing teams to keep everyone aligned.
- What Is a Full Unit Turnover?
- Why a Turnover Checklist Matters
- How the Turnover Process Works
- Sample Turnover Timeline (Day-by-Day)
- The Full Unit Turnover Checklist
- Approaches and Scheduling in Multi-Unit Buildings
- Best Practices for Faster, Cleaner Turnovers
- Tools, Materials, and Resources
- DIY vs. General Contractor vs. Multi-Unit Specialist
- Buying Guide: Choosing a Turnover Partner
- Mini Case Studies and Examples
- Frequently Asked Questions
- Key Takeaways and Next Steps
- Related Guides in This Series
What Is a Full Unit Turnover?
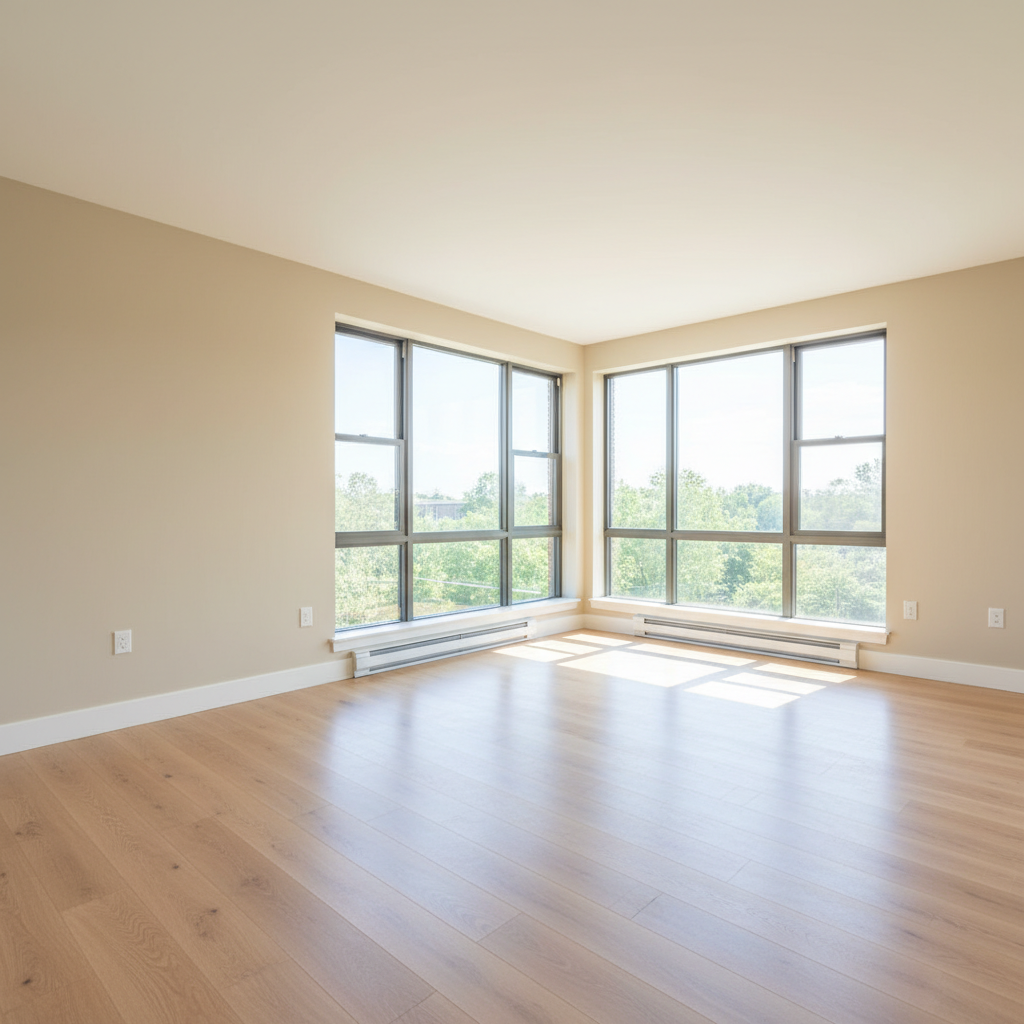
A full unit turnover is the structured reset of a rental after move-out to restore safety, function, and appeal. It spans inspection, repairs, upgrades, deep cleaning, and verification, delivering a move-in-ready space that meets code and brand standards while minimizing downtime and disruption.
In multi-unit environments, a turnover is more than a clean and paint. It’s a repeatable process that protects asset value and brand reputation at scale. For portfolios, consistency beats one-off heroics; standardized finishes and predictable scheduling win, especially when units share the same finish package.
- Scope: Walls, floors, fixtures, doors, cabinets, appliances, plumbing/electrical touch-ups, and life-safety checks.
- Outcome: Move-in-ready condition aligned with your property’s approved finish schedule.
- Timing: Many 1-bedroom units complete inside a workweek when sequencing and materials are tight.
- Quality gate: A documented final walkthrough with punch-list closeout and photos.
Why a Turnover Checklist Matters
A turnover checklist turns a messy move-out into an on-time, on-brand handover. It reduces vacancy days, prevents rework, and keeps maintenance, safety, and cleaning aligned. In multi-unit buildings, checklists standardize results across dozens of apartments and help teams replicate wins.
Small misses create big delays. A single forgotten part can stall a painter or tiler, extending vacancy and compounding marketing costs. A checklist packages tasks so crews move in lockstep, inspectors sign off faster, and leasing can activate sooner. Fewer surprises mean predictable leasing calendars.
- Reduced downtime: Sequencing limits idle time between trades and phases.
- Predictability: Timelines become measurable and repeatable across the portfolio.
- Compliance: Safety checks and code items aren’t skipped or delayed.
- Consistency: Standardized finishes maintain a uniform look and simplify maintenance.
How the Turnover Process Works
The most reliable turnover processes follow five phases: assess, scope, schedule, execute, and verify. Each phase has clear owners, materials ready before day one, and documented checks. Tight coordination compresses timelines and improves quality while keeping neighbors comfortable.
Phase 1: Assess and Document
Start with a structured move-out inspection that prioritizes health and safety before cosmetics. Capture photos and notes by room; label anything that could impact other trades.
- Test water shutoffs, GFCIs, smoke/CO detectors, and appliances.
- Mark moisture or soft spots; log must-fix items first.
- Flag like-for-like replacements vs planned upgrades.
Phase 2: Scope and Approvals
Define the line between repair and upgrade. Lock your finish package early so purchasing and staging can begin immediately.
- Confirm paint color, cabinet door style, hardware finish, tile pattern, and flooring spec.
- Secure signoff on scope and target handover date; set QA checkpoints.
- Create a room-by-room task list for trade leads.
Phase 3: Schedule and Stage
Book trades in logical order and pre-stage materials to avoid day-one surprises. Protect corridors and elevators to respect occupied buildings.
- Sequence: demolition, rough repairs, walls, floors, fixtures, paint, clean.
- Stage paint, LVP, tile, caulk, trim, and hardware on site with labels.
- Post quiet hours and establish dust control and daily housekeeping.
Phase 4: Execute
Work clean, verify measurements, and document progress. Early inspections prevent snowballing defects.
- Surface prep, wall repairs, priming, and caulking.
- Flooring replacement or repairs; tile work per spec.
- Cabinet, countertop, and fixture replacements; plumbing/electrical checks.
- Final paint, trims, hardware, and door adjustments.
- Deep clean and debris removal with HEPA vacs.
Phase 5: Verify and Handover
Finish with a punch walk, documented fixes, and a clean, photographed unit ready for leasing.
- Operate all systems; test every outlet and switch.
- Photograph final condition by room for marketing and records.
- Deliver keys/fobs and the signoff packet to leasing.
Sample Turnover Timeline (Day-by-Day)
This sample five-day schedule shows how disciplined sequencing closes punch lists faster. Adjust durations to your unit size and scope, but keep the order and QA gates. A consistent rhythm keeps crews efficient and leasing teams informed.
| Day | Main Tasks | QA Gate | Notes |
|---|---|---|---|
| Day 1 | Assessment confirm, material staging, demolition, surface prep | Pre-paint/repair signoff | Protect corridors; label debris path |
| Day 2 | Wall repairs, priming, first coat; plumbing/electrical adjustments | Wall flatness and patch quality | Photograph progress by room |
| Day 3 | Flooring install or tile set; cabinets/countertops placed | Transitions level, tile alignment | Confirm hardware counts |
| Day 4 | Final paint, trims, caulk, hardware, door adjustments | Touch-up under daylight | QA checklist signoff |
| Day 5 | Deep clean, appliances, glass, vents; final walkthrough | Complete punch closeout | Marketing photos; handover |
The Full Unit Turnover Checklist (Printable)
Use this full unit turnover checklist to move from inspection to handover without backtracking. Group tasks by room and trade, pre-stage materials, and track completion. When every box is checked, marketing photos look crisp and leasing can start immediately.
Entry and General
- Change locks; verify keys and fobs.
- Inspect and patch walls; sand as needed.
- Prime and apply two finish coats with standardized paint.
- Replace damaged baseboards/trim; caulk and paint.
- Test smoke/CO detectors; replace batteries.
- Verify GFCI outlets where required; replace damaged plates.
- Check windows and screens; repair latches and seals.
- Clean blinds and window tracks.
- Vacuum supply/return vents; replace filters if applicable.
Flooring and Tiling
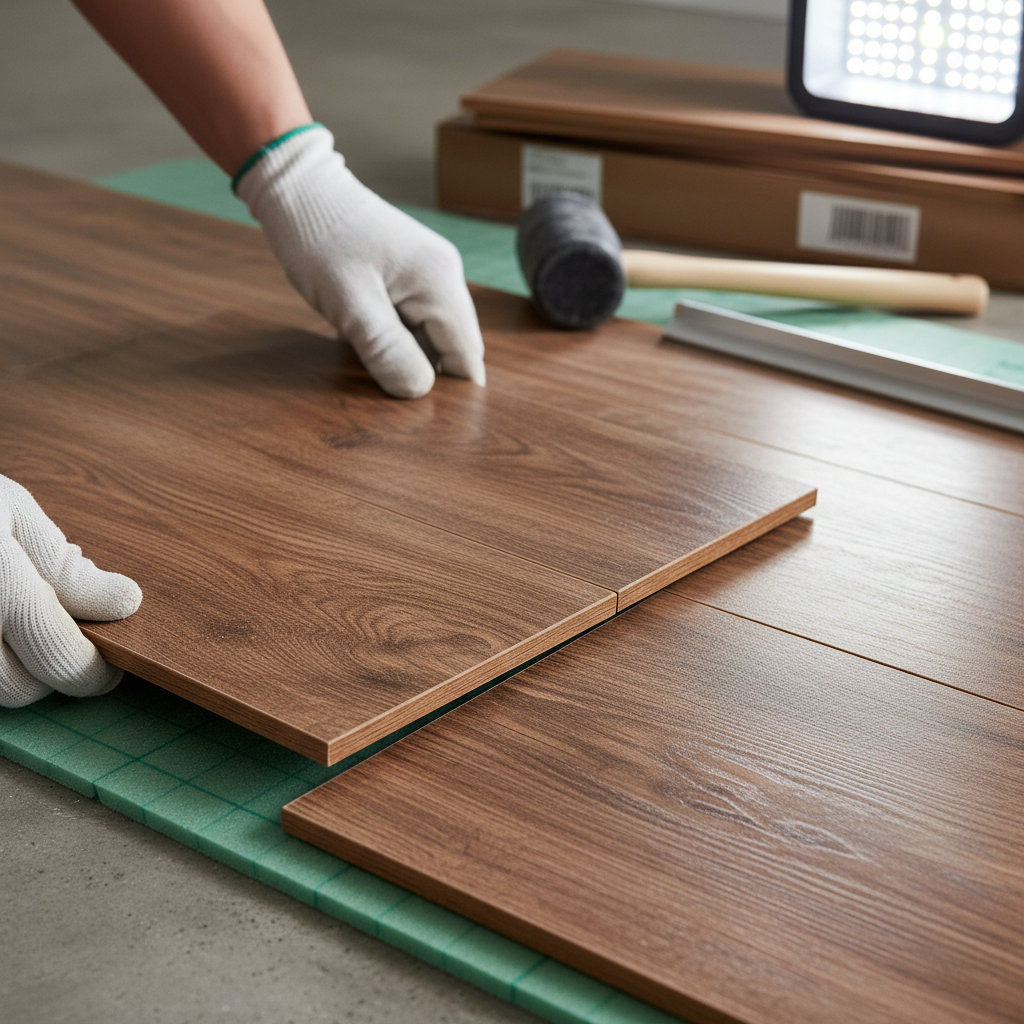
- Assess carpet vs replace with LVP per finish package.
- Repair or replace cracked tiles; re-grout where needed.
- Install thresholds and transitions; ensure flatness.
- Silicone at wet-area perimeters.
Kitchen
- Replace or reface cabinets; verify soft-close hardware.
- Install new countertops; seal properly.
- Upgrade faucet and shutoffs; check for leaks.
- Verify appliance operation; replace damaged units.
- Backsplash tile repair or replacement.
- Clean range hood and filters.
Bathroom
- Replace vanity, top, and faucet per spec.
- Re-caulk tub/shower; re-grout as needed.
- Install new exhaust fan if required; test airflow.
- Verify GFCI and lighting; replace plates and trims.
- Install new mirror/medicine cabinet.
- Replace worn toilet seat; test flush and fill.
Bedrooms and Living Areas
- Closet shelving repairs; add coat hooks if specified.
- Door adjustments; replace hinges/handles for consistency.
- Outlet/switch plate uniformity and labeling.
- Touch-up paint inspection under daylight.
Final Cleaning and QA
- Full sweep, vacuum, and mop with low-VOC cleaners.
- Appliance interior/exterior deep clean.
- Window glass, frames, and sills.
- Final photo set for marketing; file turnover report.
Approaches and Scheduling in Multi-Unit Buildings
Standardize finishes and sequence trades the same way every time. In multi-unit buildings, a repeatable playbook shortens learning curves, reduces rework, and lets you scale from one to dozens of concurrent turnovers without chaos.
In practice, we align scopes to three categories—light, standard, and heavy—so purchasing and labor plans are realistic. We also phase work by stacks or floors to reduce elevator time and hallway congestion. Quiet hours, dust control, and daily housekeeping maintain good neighbor status.
- Light, Standard, Heavy: Match scope to condition; avoid over-improving units that only need cosmetics.
- Vacant vs Occupied: Use corridor protection, HEPA air scrubbers, and quiet hours when neighbors are present.
- Phased Blocks: Group units by stack or floor for efficient material moves and supervision.
- Finish Packages: Keep approved palettes and SKUs consistent across the property.

Best Practices for Faster, Cleaner Turnovers
Front-load decisions, pre-stage materials, and enforce quality gates. These three moves eliminate dead time, keep crews accountable, and raise the bar on the final result so units list faster and rent at their target.
Here’s what we’ve learned across 500+ projects: speed is a function of decisions made before day one and quality verified at the right moments. Document everything. Photo logs help resolve questions fast and align leasing on what’s truly move-in ready.
- Decision lock: Approve finishes and scope before crews arrive; stop mid-stream design changes.
- Material staging: Store paint, LVP, tile, trim, and hardware in a secure on-site cage.
- QA checkpoints: Inspect at surface prep, pre-paint, post-floor, and final clean.
- Safety-first: Daily housekeeping and cord control in occupied halls to reduce incidents.
- Documentation: Photo logs, signoffs, and a shared punch list keep everyone honest.
- Finish consistency: One palette and hardware set per property simplifies training and stock.
Tools, Materials, and Resources
Turnovers move faster when the right tools and materials are on-site and labeled. Use durable, multi-family–tested finishes and keep replacement parts standardized to reduce SKUs, training time, and storage footprint.
In our experience, a compact, labeled kit prevents the majority of day-one delays. Durable materials like low-VOC paint in eggshell/satin and click-lock LVP withstand high traffic and simplify cleaning. For wall prep, consistent sanding and priming methods deliver smoother paint that photographs well.
- Tools: HEPA vac, oscillating multi-tool, wet/dry vac, laser level, stud finder, stapler, caulk guns.
- Materials: Low-VOC interior paint, LVP, ceramic tile, silicone, grout, primer, trim, fasteners.
- Consumables: Drop cloths, tape, blades, sanding sponges, PPE.
- Documentation: Printed checklists, finish schedule, and photo templates in each kit.
For additional context on deep cleaning scope, see this practical deep cleaning checklist. For surface readiness, a thorough wall prep checklist underscores the value of consistent prep. Space planning inspiration is also available in these condo renovation tips.
DIY vs. General Contractor vs. Multi-Unit Specialist
For speed and consistency, multi-unit specialists outperform ad-hoc DIY or single-project contractors. Standardized crews, finishes, and QA reduce vacancy and surprises, especially across portfolios and occupied buildings.
| Approach | Strengths | Risks | Best For |
|---|---|---|---|
| DIY / In-house | Direct control; flexible scheduling | Longer timelines; skill gaps; inconsistent finishes | Small portfolios; light scopes |
| General contractor | Broad trade access; single point of contact | Not optimized for repeat units; variable standards | One-off heavy renovations |
| Multi-unit specialist | Standardized playbooks; faster handovers; QA discipline | Requires upfront finish decisions; scheduling windows | Portfolios; occupied buildings; repeatable scopes |
Buying Guide: Choosing a Turnover Partner
Vet partners on safety compliance, portfolio experience, finish standardization, and scheduling discipline. Ask for a documented process from assessment to final handover and proofs of insurance. In London, ON, prioritize teams comfortable working in occupied, multi-unit buildings and delivering predictable schedules year-round.
When portfolios span multiple properties, scalability and communication matter as much as craftsmanship. Ask for evidence of concurrent unit delivery and how the team handles access, dust, and neighbor communication. Require a written escalation path for surprises.
- Safety and compliance: Training, insurance, and WSIB documentation are non-negotiable.
- Process proof: Checklists, sample reports, and photo logs that mirror this guide.
- Finish controls: Standard spec sheets and SKUs, plus a sample kit you can inspect.
- Scale: Ability to run several units concurrently with the same playbook.
- References: Recent multi-unit turnovers with before/after photos.
Local considerations for London
- Plan work windows around school-year move-outs and winter weather, which can affect paint curing and ventilation.
- Coordinate quiet hours and corridor protection to respect neighbors in occupied buildings.
- Use durable, salt-resistant entry finishes that handle Southwest Ontario winters.
Need a structured, low-disruption turnover? We specialize in multi-unit and apartment properties in London and across Southwest Ontario—standardized finishes, schedule-driven delivery, and rigorous QA. Request a site assessment and we’ll provide a clear scope and timeline.
Mini Case Studies and Examples
Consistent playbooks deliver consistent outcomes. These brief scenarios show how structured turnovers shorten vacancy while upgrading finishes that tenants notice first: floors, kitchens, and baths.
London 12-unit refresh
A mid-rise in London required quick alignment across 12 vacants. We standardized LVP, a two-tone paint scheme, and vanity/faucet packages. By stair-stepping starts floor by floor, crews never waited on materials or access. The documented QA gates cut punch items per unit to a handful of quick fixes.
Portfolio alignment across three buildings
An owner operating in London, Woodstock, and Chatham unified cabinet styles, hardware, and paint across all sites. Maintenance now stocks one repair kit per unit type. Training time for new hires dropped because the finishes and steps are the same everywhere.
Occupied wing bathroom repairs
In an occupied wing, night-shift re-tiling with dust control and exhaust fan upgrades kept residents comfortable and avoided daytime hallway congestion. Clear daily notes to property staff helped plan elevator usage and cleaning support.
Frequently Asked Questions
Property managers ask about timelines, scope control, and working in occupied buildings. The answers below keep your plan grounded and your handover date firm.
What is included in a full unit turnover checklist?
A complete checklist covers assessment, repairs, upgrades, painting, flooring, kitchen and bath fixtures, safety checks, cleaning, and a documented final walkthrough. Group tasks by room and trade to avoid rework and speed handover.
How long should a standard turnover take?
With materials pre-staged and decisions locked, many 1-bedroom units finish within a workweek. Heavy scopes involving tile, cabinets, or electrical adjustments add time. Scheduling trades back-to-back is the biggest factor in speed.
How do you handle turnovers in occupied buildings?
Use corridor protection, HEPA filtration, and quiet-hour scheduling. Communicate daily with property staff, maintain clean worksites, and stage materials to reduce hallway traffic. Safety and courtesy keep operations smooth.
What finishes last longest in rentals?
Low-VOC paint in satin/eggshell, click-lock LVP with high wear layers, ceramic wall tile with silicone edges, and simple, stockable hardware tend to hold up well in high-traffic multi-family spaces.
Key Takeaways and Next Steps
Lock decisions, stage materials, and follow a documented checklist. Standardized finishes and disciplined QA close punch lists quickly, so leasing can launch faster and vacancy stays low.
- Decide repair vs replace early and apply the same rules to every unit.
- Keep one standard finish package per property; stock replacement parts.
- Book trades in the same order every time; use QA gates to prevent rework.
- Document with photos and checklists so leasing and maintenance stay aligned.
If you manage apartments in London or Southwest Ontario and want a fast, predictable turnover, our multi-unit team is ready. Book a discovery call and we’ll map your next handover.
Related Guides in This Series
Deepen your playbook with focused, step-by-step guides for kitchens, wall repairs, and quality checks. Each article expands a part of the turnover sequence and includes practical field tips.
Strengthen wall prep and paint results by reviewing our guidance on wall repairs and patchwork, then align scopes with our unit turnover scope template. For kitchens, use the kitchen remodeling checklist and consider strategic cabinet replacements. Finally, tighten signoff with our unit handover quality check and boost curb appeal with paint and repairs. For a full walkthrough of sequencing and leasing readiness, see our overview on the apartment turnover process.