
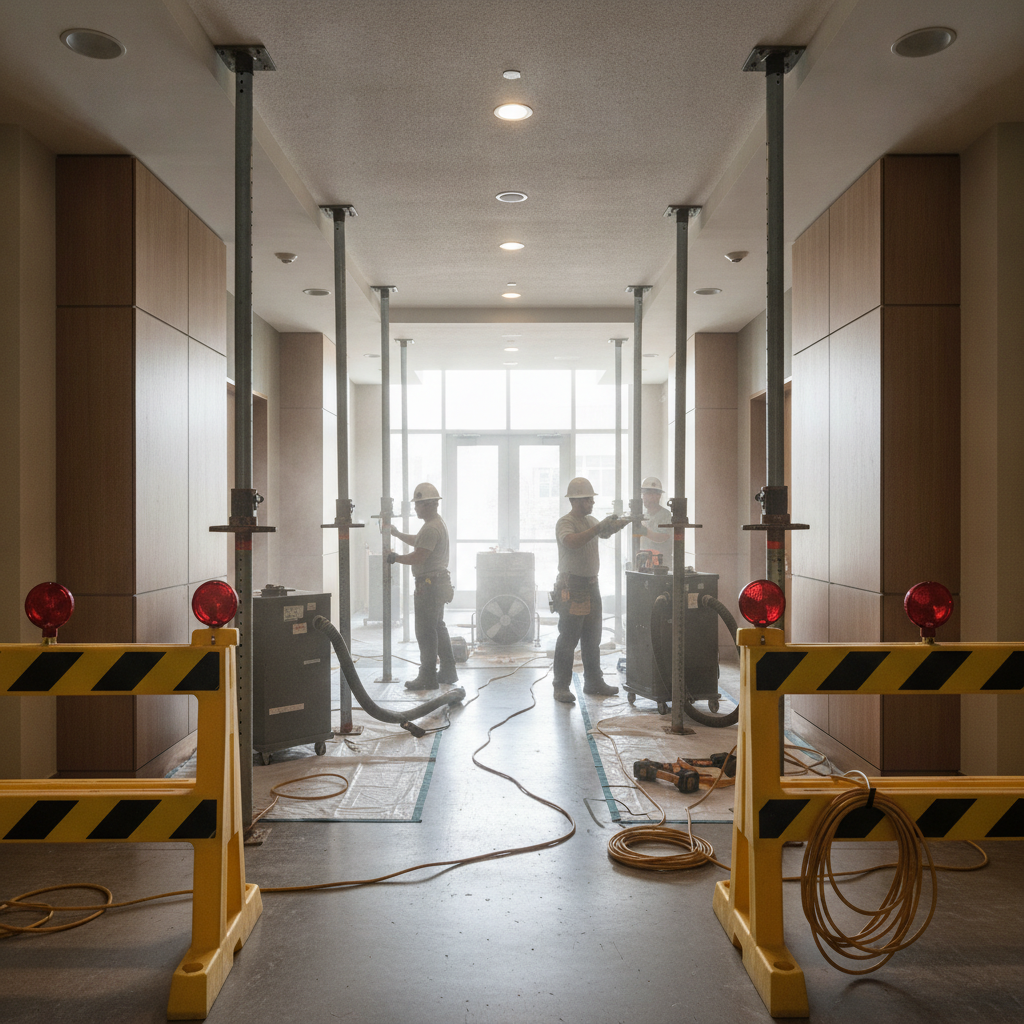
Repair stabilization before full renovation is the rapid, safety-first work that makes an apartment or multi-unit building secure, dry, and operational before cosmetic or layout upgrades begin. In London, this phase protects tenants, prevents secondary damage, and keeps schedules on track—so your renovation dollars go into improvements, not rework.
By Mahal Concrete and Constructions · Last updated: 2026-07-02
At a Glance Summary
Stabilization comes first: make spaces safe, stop active damage, and control environmental risks before remodeling. For multi-unit properties, that means shoring, drying, electrical and plumbing checks, and dust containment. A clear handoff—documented and inspected—prevents surprises that derail your renovation schedule.
- Goal: Rapidly remove hazards and halt damage so renovation can start cleanly.
- Scope: Structural shoring, moisture mitigation, temporary repairs, life-safety checks, containment, and documentation.
- Outcome: Predictable timelines, fewer change orders, and lower vacancy time across units.
What Is Repair Stabilization Before Full Renovation?
Repair stabilization is the make-safe phase that addresses urgent structural, moisture, electrical, and health risks before remodeling begins. In apartments, it prevents compounding damage across neighboring units and sets a controlled baseline—so subsequent demolition, finishes, and installations proceed predictably.
In our experience supporting London property managers, stabilization is a defined, time-bound scope: assess, contain, make safe, and document. It’s not the renovation; it’s the foundation the renovation needs.
- Make-safe actions: Temporary shoring, isolation of circuits, shutoffs, and leak control.
- Environmental control: Dry-down, ventilation, HEPA filtration, and dust containment.
- Life-safety checks: GFCI/ARC-fault at wet areas, smoke/CO device checks, egress clearances.
- Documentation: Photos, readings, and a stabilization sign-off to hand the unit to the renovation team.
Here’s the thing: if you stabilize well, your renovation team can demo, rebuild, and finish with fewer surprises and fewer change orders. That’s the easiest win you can create on day one.
Why Stabilize First for Apartment Projects in London
Stabilizing first protects tenants, controls risk across shared assemblies, and preserves schedules. In multi-unit buildings, issues spread quickly—water, odors, dust, and electrical faults travel. A structured make-safe phase contains problems and prevents new ones.
We’ve found that multi-unit properties amplify small defects. A pinhole leak can migrate through party walls; a sagging joist can telegraph into neighboring kitchens. Stabilization interrupts those chains.
- Tenant protection: Phased work, containment, and quiet hours reduce disruption in occupied buildings.
- Portfolio consistency: Standardized stabilization checklists create repeatable results across dozens of units.
- Schedule control: Known conditions allow accurate lead-time planning for cabinets, tile, and fixtures.
- Insurance and compliance: A WSIB-compliant, fully insured contractor reduces administrative and onsite risk.
In London, winter moisture swings and spring melt add stress to building envelopes. Stabilization—especially dry-down and weatherproofing—keeps units rentable and your renovation dates intact.
How Stabilization Works: Step-by-Step
A proven stabilization sequence moves from assessment to control, then to make-safe and documentation. It starts with hazards, then water, then electrical and mechanical checks, and ends with a clean, contained unit ready for renovation.
Our standardized, end-to-end approach mirrors how we deliver full unit turnovers: clear scope, scheduled execution with minimal disruption, and a documented handover.
- Site assessment and scope finalization: Walkthrough, moisture readings, laser levels, and photos establish baseline conditions.
- Immediate hazards: Shore structural members, post warning signage, and isolate affected circuits and shutoffs.
- Moisture and water control: Stop the source, extract standing water, set dehumidifiers, and create airflow paths.
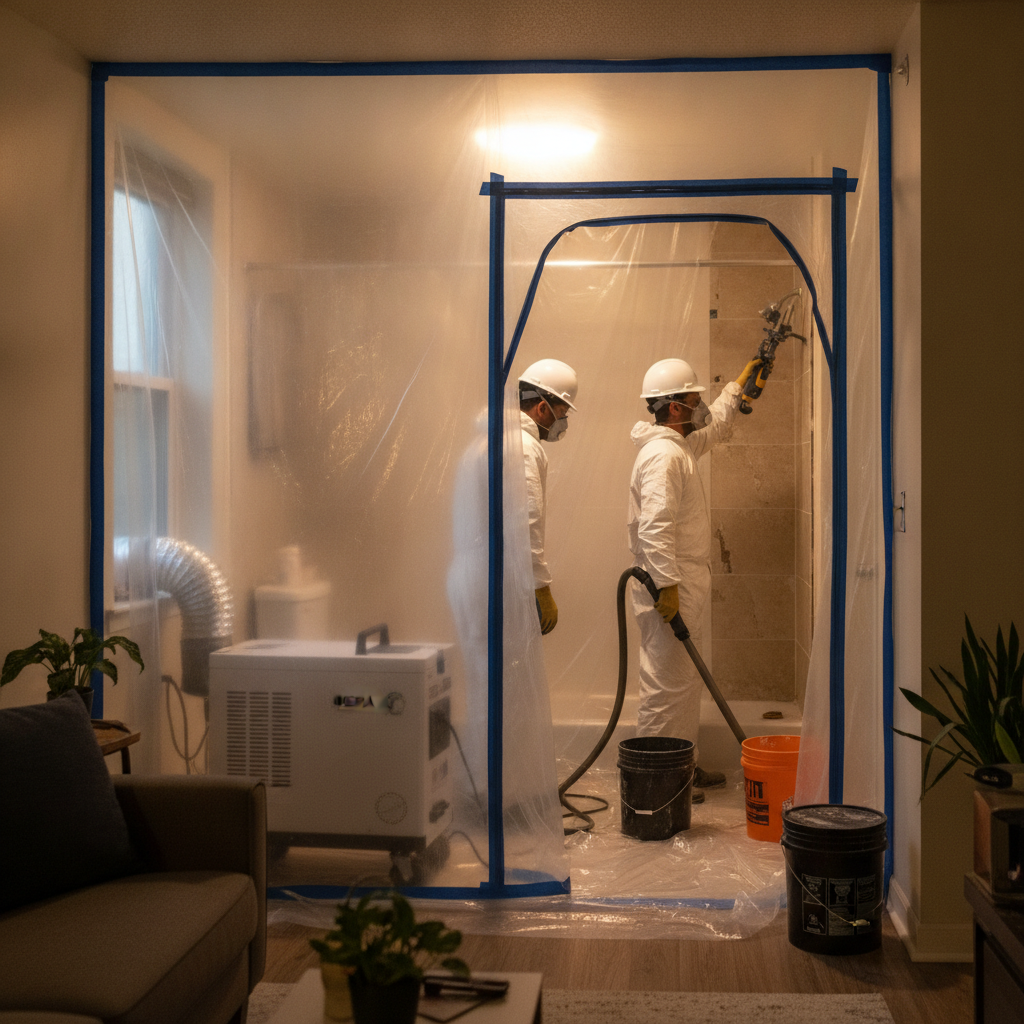
- Containment: Erect plastic barriers with zipper access, add sticky mats, and run HEPA air scrubbers.
- Temporary repairs: Patch roof penetrations, cap plumbing, board compromised openings, and seal drafts.
- Life-safety checks: Test GFCI, smoke/CO devices, and confirm egress and lighting at corridors.
- Mechanical verification: Inspect HVAC returns, filters, and condensate paths to prevent cross-contamination.
- Documentation: Log readings, capture before/after photos, and summarize findings.
- Stakeholder communication: Notify tenants about timelines and quiet hours; update property managers with milestones.
- Stabilization sign-off: Handover packet authorizes demolition and renovation to proceed.
Want a deeper prep checklist for emergency conditions? See our emergency repair guide for apartments and our detailed stabilization playbook for occupied properties.
Types of Stabilization Methods for Multi-Unit Buildings
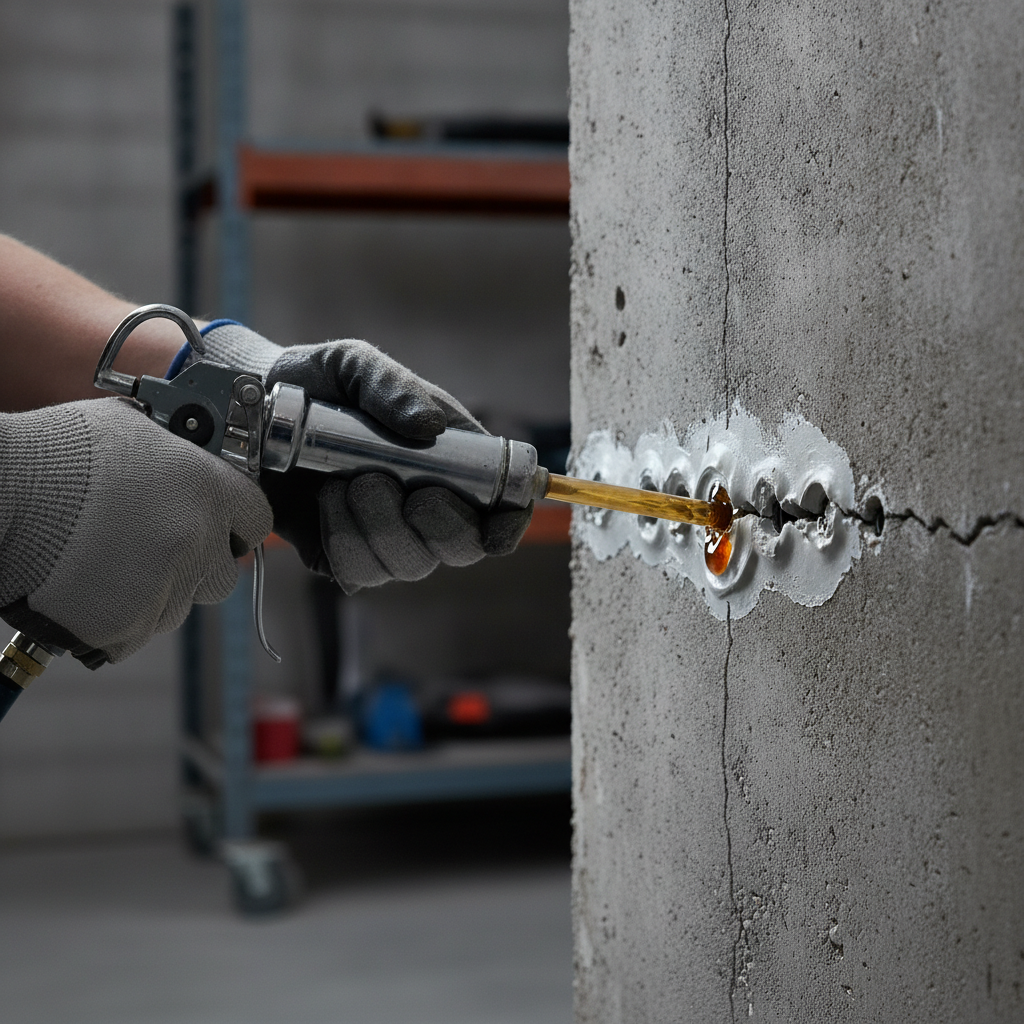
Stabilization blends structural, moisture, mechanical, electrical, and environmental controls. The right mix depends on the trigger—leak, movement, fire, or age-related failure—but the objective is constant: stop damage, secure the area, and create a safe handoff for renovation.
Structural and envelope stabilization
- Temporary shoring: Adjustable steel posts and cribbing to relieve overloaded joists or headers.
- Envelope patching: Tarp or membrane patches at penetrations; sealants at flashing and sills.
- Door and stair safety: Reinforce loose treads and landings; ensure egress doors latch and swing clear.
Moisture mitigation and dry-down
- Source isolation: Cap failed supplies; reroute drains; divert exterior runoff temporarily.
- Extraction and dehumidification: Pull free water; use dehumidifiers and air movers for dry-down.
- Material decisions: Assess salvage vs. removal for baseboards, drywall, and subfloors.
Electrical and fire-safety controls
- Circuit isolation: Identify and tag affected circuits; protect wet locations.
- Device checks: Confirm GFCI/ARC-fault in kitchens, baths, and laundry zones.
- Smoke/CO readiness: Verify devices present and operational before work resumes.
HVAC and indoor air quality
- Filter upgrades: Temporary higher-efficiency filters during dusty phases.
- Return protection: Seal returns in active work zones to prevent dust spread.
- Negative air: Use HEPA scrubbers to keep particulates inside the containment zone.
Health and material hazards
- Mold response: Remove saturated, non-salvageable materials; dry and disinfect remaining substrates.
- Legacy materials: If suspect asbestos/lead is present, pause and engage licensed abatement before disturbance.
- Odor control: Ventilate, scrub air, and isolate odor sources prior to demolition.
Stabilization also protects adjacencies—stairs, corridors, and neighboring units share air and assemblies. A solid containment and ventilation plan stops dust drift and keeps common areas clean.
Best Practices and Sequencing That Keep Projects On Track
The best approach is simple: stabilize hazards first, then validate conditions, then renovate. Lock scope, communicate with tenants, and document readings and photos. That rhythm delivers consistent results across large portfolios.
Stabilization best practices
- Start at the source: Fix causes (leaks, penetrations, grade) before addressing symptoms.
- Sequence for safety: Power isolation precedes water work; shoring precedes demo.
- Contain to protect: Build and maintain dust walls; run HEPA scrubbers continuously during disturbance.
- Standardize: Use the same materials and methods across buildings for predictable results.
- Document: Moisture readings, photos, and sign-offs form the bridge between stabilization and renovation.
Local considerations for London
- Expect freeze–thaw movement in exterior stairs and slabs; prioritize sealing and safe treads before interior upgrades.
- Plan stabilization timelines around spring melt and heavy rains; schedule envelope checks and dry-down capacity in advance.
- Coordinate quiet hours and vertical access routes to keep occupied floors safe and clear during weekday work.
To see how this plays forward into a clean renovation plan, review our renovation proposal checklist and our scheduling tips for apartments.
Need a stabilization walk-through? Our WSIB-compliant team delivers rapid assessments, tenant-friendly containment, and a documented handoff so your renovation can begin with confidence. Start with our quick consultation.
Tools, Materials, and Resources for Effective Stabilization
A capable stabilization kit includes shoring gear, moisture control equipment, electrical safety devices, and containment supplies—plus checklists and sign-off forms. The right tools speed response and standardize outcomes across multiple units.
Core equipment
- Structural: Adjustable posts, cribbing, laser levels, impact drivers.
- Moisture: Extractors, dehumidifiers, air movers, moisture meters.
- Electrical: GFCI protection, lockout/tagout kits, non-contact voltage testers.
- Containment: Poly sheeting with zippers, HEPA scrubbers, negative air ducts, sticky mats.
- PPE: Respirators, gloves, eye and hearing protection, cut-resistant sleeves.
Standard materials
- Sealants and membranes: For envelope patches and flashing repairs.
- Epoxy and ties: For crack injection and temporary fastening.
- Plumbing caps and valves: For isolating supplies and drains.
- Firestopping: For penetrations at rated assemblies.
For framing your internal playbook, compare advice in established renovation overviews. For example, this commercial renovation guide highlights sequencing discipline, while this plumbing-focused overview stresses order-of-operations in wet areas. A broader look at whole-home planning from this full renovation guide reinforces the value of a make-safe phase before finishes.
Process & Responsibility Table (From Stabilize to Renovate)
Use a simple RACI-style table to clarify who inspects, who stabilizes, who verifies, and who renovates. Clear responsibility reduces delays and keeps occupied properties safe during turnover.
| Phase | Main Tasks | Primary Owner | Notes |
|---|---|---|---|
| Assessment | Walkthrough, readings, photos, scope | Contractor | Share baseline report with property manager |
| Hazard Control | Shoring, shutoffs, circuit isolation | Contractor | Post signage; restrict access |
| Moisture Control | Extraction, dry-down, source fix | Contractor | Log readings and drying duration |
| Containment | Barriers, HEPA, negative air | Contractor | Protect adjacent occupied areas |
| Life-Safety | GFCI/ARC checks, devices, egress | Contractor | Document pass/fail for follow-up |
| Handoff | Sign-off, renovation kickoff | Contractor & Manager | Lock scope; confirm dates |
Clarity here pays dividends during cabinet installation, tile work, and final paint—every downstream task depends on a tight handoff.
Case Studies & Examples from London Multi-Unit Properties
Real-world stabilization reduces disruption, shortens downtime, and prevents rework. These anonymized London examples show how a defined make-safe phase enabled clean, on-time renovations across apartment units.
Case 1: Stack leak between bathrooms
A persistent leak impacted two vertically stacked washrooms. We isolated water, capped feeds, opened a controlled access panel, and installed containment with HEPA scrubbers. After dry-down and device checks, our Washroom Remodeling team completed tiling and fixture upgrades without odor or dust complaints from adjacent tenants.
Case 2: Sagging kitchen header
During a Kitchen Remodeling prep, we found deflection at a pass-through. Temporary shoring held the span while we confirmed load paths. Stabilization sign-off allowed cabinetry, countertop installation, and backsplash tiling to proceed with confidence.
Case 3: Entry stair safety in winter
Freeze–thaw movement loosened exterior steps serving several units. We stabilized treads and landings, corrected drainage at the base, and reopened access routes with clear signage—then completed interior Full Unit Turnover without rerouting tenants.
Case 4: Odor and IAQ during occupied renovation
While performing Paint and Repairs in an occupied corridor, negative air and barrier maintenance kept common areas clean. Measured particulate reduction inside the containment showed the plan was working, and tenants reported normal air quality outside the work zone.
For more examples of how we prioritize safety and predictability during emergencies, see our occupied-property stabilization guide.
Budget & Scheduling Considerations (No Pricing)
Think of stabilization as risk control that protects your renovation investment. Upfront make-safe work reduces scope creep, limits demolition beyond what’s necessary, and keeps procurement and trades on a predictable track.
- Drivers of time: Access, drying duration, and permitting for structural changes.
- Common pitfalls: Starting demo before isolating sources; skipping dust control; unclear responsibilities.
- Portfolio wins: Standard stabilization kits and checklists reduce vacancy days across multiple properties.
When you’re ready to formalize the renovation phase, use our repair and upgrade priorities to target kitchens, baths, flooring and tiling, and paint in the right order. Pair that with our full unit turnover checklist to align handover and final cleaning.
Frequently Asked Questions
These concise answers cover the make-safe questions we hear most from London property managers. Each response focuses on sequencing, safety, and how stabilization supports a predictable renovation.
What exactly counts as stabilization?
Any immediate action that makes the space safe and stops active damage before renovation—shoring, leak control, electrical isolation, dry-down, containment, and life-safety checks. It ends with documentation that hands a clean, controlled unit to your renovation team.
Can stabilization happen in occupied buildings?
Yes. We schedule tenant-friendly windows, build dust barriers, run HEPA scrubbers, and maintain clear egress. Communication and signage are part of the plan so occupants stay informed and safe while work proceeds.
When do I bring in abatement for suspect materials?
Pause if you encounter suspect asbestos or lead. Stabilize the area, maintain containment, and engage licensed abatement before any disturbance. After clearance, the renovation team can resume demolition and rebuild.
How do I prevent rework once renovation starts?
Lock stabilization scope, document conditions, and verify life-safety and dry-down before demolition. Then align your renovation proposal, schedule, and material lead times to that baseline. This keeps changes and delays to a minimum.
Key Takeaways & Next Steps
Stabilize first, then renovate. Focus on hazards, water, containment, and life safety. Document everything. That’s how multi-unit projects stay safe, predictable, and on schedule across London properties.
- Repair stabilization before full renovation protects tenants and schedules.
- Standardized checklists deliver consistent results across portfolios.
- Documentation bridges the gap between make-safe and build-back.
- Tenant-friendly staging and HEPA containment reduce complaints.
- Ready to move? Book a stabilization walk-through with our WSIB-compliant team in London.
Plan your next step: Start with a stabilization assessment, then align your renovation proposal and schedule to the verified site conditions.