
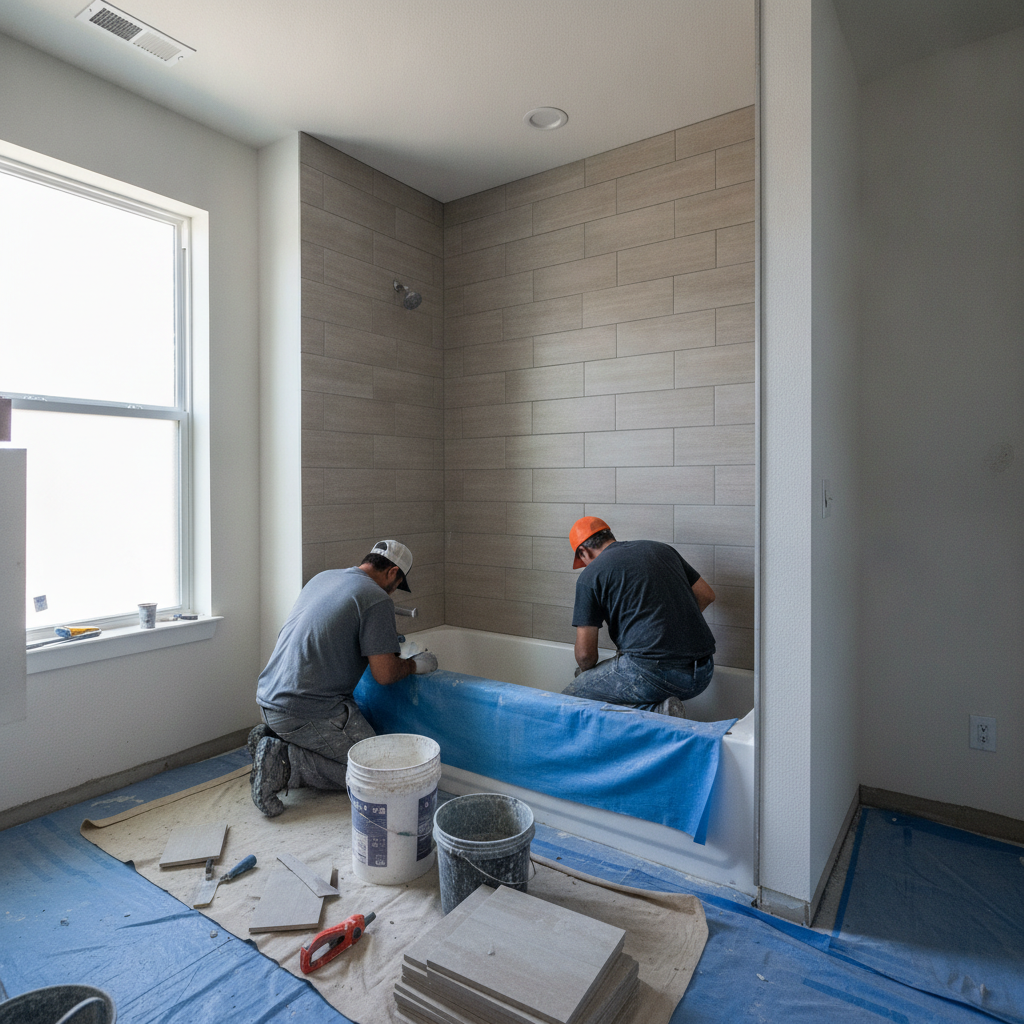
Tile installation for apartment bathrooms is the professional layout, waterproofing, and setting of ceramic or porcelain tile in multi‑unit washrooms. Done right, it prevents leaks, speeds cleanups, and withstands heavy tenant use. Based at 805 Chelton Rd in London, ON, Mahal Concrete and Constructions delivers standardized, code‑aware installs that reduce vacancies.
By Mahal Concrete and Constructions • Last updated: 2026-06-20
Overview and Table of Contents
This complete guide explains tile installation for apartment bathrooms from assessment to final handover. You’ll learn prerequisites, step‑by‑step workflow, materials, best practices, tools, troubleshooting, and London, ON–specific tips. Use it to standardize specs across buildings, minimize tenant disruption, and hand off move‑in‑ready units faster.
Use this article as a field‑ready playbook for multi‑unit washrooms. It combines how‑to detail with portfolio‑level controls, tailored to property managers and landlords who need predictable schedules in occupied buildings.
- What tile installation in apartments includes—and why it’s different
- Why upgrading tile matters for turnovers and tenant satisfaction
- Prerequisites: assessments, substrates, ventilation, and safety
- Step‑by‑step execution from layout to final sealant and QA
- Material choices, patterns, and when to use each
- Best practices for multi‑unit portfolio consistency
- Tools, documentation, and warranty handover
- Troubleshooting common failures (with fixes)
- Real London multi‑unit examples and outcomes
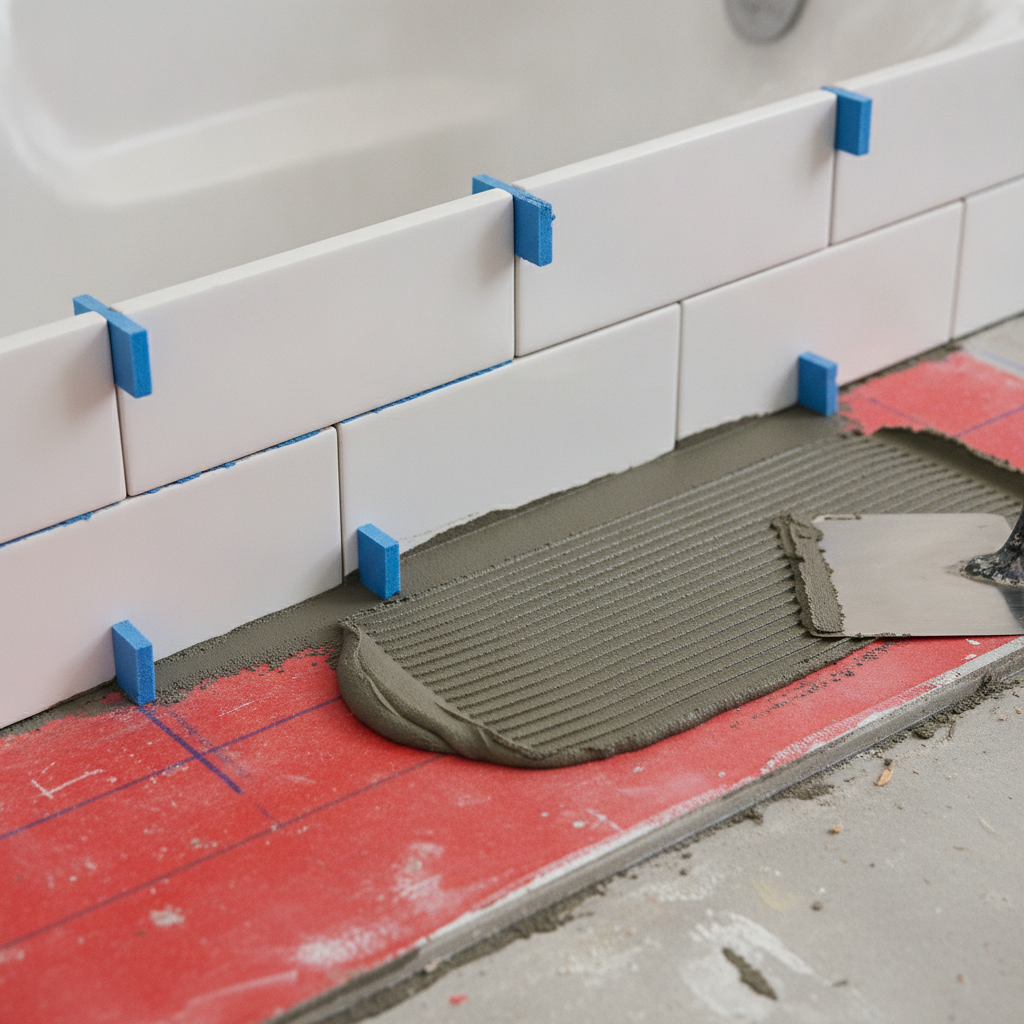
What Is Tile Installation for Apartment Bathrooms?
Tile installation for apartment bathrooms is the coordinated process of substrate prep, waterproofing, tile setting, grouting, and sealing designed for high‑traffic, moisture‑heavy, multi‑unit spaces. It emphasizes standardized details, low‑disruption scheduling, and durable finishes that hold up to frequent tenant turnover.
In multi‑unit properties, bathrooms face daily steam, splashes, and cleaning chemicals. The installation method must balance speed, quality, and repeatability across dozens of units.
Core components in multi‑unit settings
- Substrate preparation: Patch, plane, and stabilize walls and floors to accept tile without movement.
- Moisture management: Use cement board, liquid or sheet membranes, and proper transitions at tubs and niches.
- Tile setting: Apply thin‑set mortar with correct notch size and directional troweling to achieve high coverage in wet zones.
- Grout and sealants: Choose grout type (sanded, unsanded, or epoxy) and silicone at all changes of plane for flexibility.
- Quality control: Inspect alignment, lippage, coverage, and cure times before turnover.
Why apartments require a different approach
- Repeatability: Standard specs ensure consistent results across properties and crews.
- Occupied work: Phased scheduling and dust controls protect residents and operations.
- Durability: Finishes must resist constant cleaning and wear from successive tenants.
Our teams focus on predictable results. The same spec and sequence we apply in one London building will mirror what we deliver across your portfolio.
Why Bathroom Tile Upgrades Matter in Multi‑Unit Properties
Bathroom tile upgrades cut vacancy days, strengthen tenant appeal, and reduce maintenance tickets. In London, ON apartments, durable tile and proper membranes limit moisture damage, keep finishes looking fresh, and help managers hand over move‑in‑ready units on reliable schedules.
Here’s the thing: a tidy, modern bathroom is one of the quickest ways to improve showings and renewals. Tile installs are visible, tactile, and long‑lasting—exactly what rentals need.
- Faster, cleaner turnovers: Standardized assemblies simplify procurement and speed inspections.
- Lower maintenance loads: Correct waterproofing reduces leaks, swollen drywall, and recurring grout issues.
- Tenant‑ready presentation: Neutral, modern tile patterns photograph well and reduce objections during tours.
- Portfolio consistency: Matching specs across buildings streamlines upkeep and inventory.
For example, a simple upgrade from aging ceramic to matte porcelain with epoxy grout can reduce staining complaints and make cleanings faster between tenants.
Prerequisites: Assessments, Substrates, and Compliance
Before setting tile, verify structure, moisture, and ventilation; define scope; and align on safety and access rules. In occupied apartments, WSIB‑compliant protocols, dust controls, and quiet-hour scheduling protect residents while enabling on‑time, low‑disruption execution.
Start with a structured assessment so surprises don’t derail your schedule.
What to confirm during the assessment
- Substrate soundness: Fix movement, rot, or soft spots. Replace gypsum in wet areas with cement board.
- Flatness and level: Check plane with a straightedge; correct dips and crowns before tiling.
- Moisture and ventilation: Look for previous leaks, verify fan operation, and confirm tub/shower transitions.
- Plumbing and electrical: Lock fixture locations early to avoid rework.
- Access and protection: Plan walkway protection, elevator use, and waste staging.
Safety and compliance in occupied buildings
- WSIB‑compliant practices: Fully insured crews with PPE, silica dust controls, and site signage.
- Noise and timing: Set quiet hours and cluster noisy cuts to tight windows.
- Clean worksite: Daily cleanup, negative‑air zones as needed, and covered vents reduce nuisance calls.
Local considerations for London
- Schedule membrane and grout cure times around damp fall and winter conditions to avoid extended drying windows.
- Batch material deliveries to London sites to limit elevator traffic and hallway clutter in multi‑story properties.
- Coordinate with building management on restroom access and water shutoffs to prevent tenant disruption.
For a deeper look at risk controls in occupied work, review our insured contractor guidelines and our occupied unit bathroom upgrade playbook.
How Professional Bathroom Tile Installation Works (Step‑by‑Step)
A repeatable 12‑step workflow—assessment, repair, waterproofing, layout, mortar, walls, floors, cuts, grout, sealant, cleanup, and QA—keeps multi‑unit tile projects on schedule. Each step has checks that prevent leaks, lippage, and callbacks across apartment portfolios.
Below is the standardized, schedule‑driven sequence our London teams use across multi‑unit properties.
- Site assessment and scope: Document dimensions, fixtures, and penetrations; confirm transitions to tubs and floors.
- Substrate repair and leveling: Replace compromised backer; skim or self‑level to meet flatness tolerances for your tile size.
- Waterproofing and vapor management: Install cement backer board in wet zones; apply liquid or sheet membranes with proper overlaps. Maintain slope to drains at about 1/4 inch per foot in shower bases.
- Layout and dry‑fit: Strike level lines. Center layouts to avoid slivers at edges. Dry‑fit at critical reveals and niches.
- Mortar selection and troweling: Use a polymer‑modified thin‑set compatible with porcelain; choose a notch that achieves high coverage in wet areas (aim for near‑full contact under tiles).
- Set wall tile: Work from a ledger line; maintain even joints. Check plumb and level every few rows.
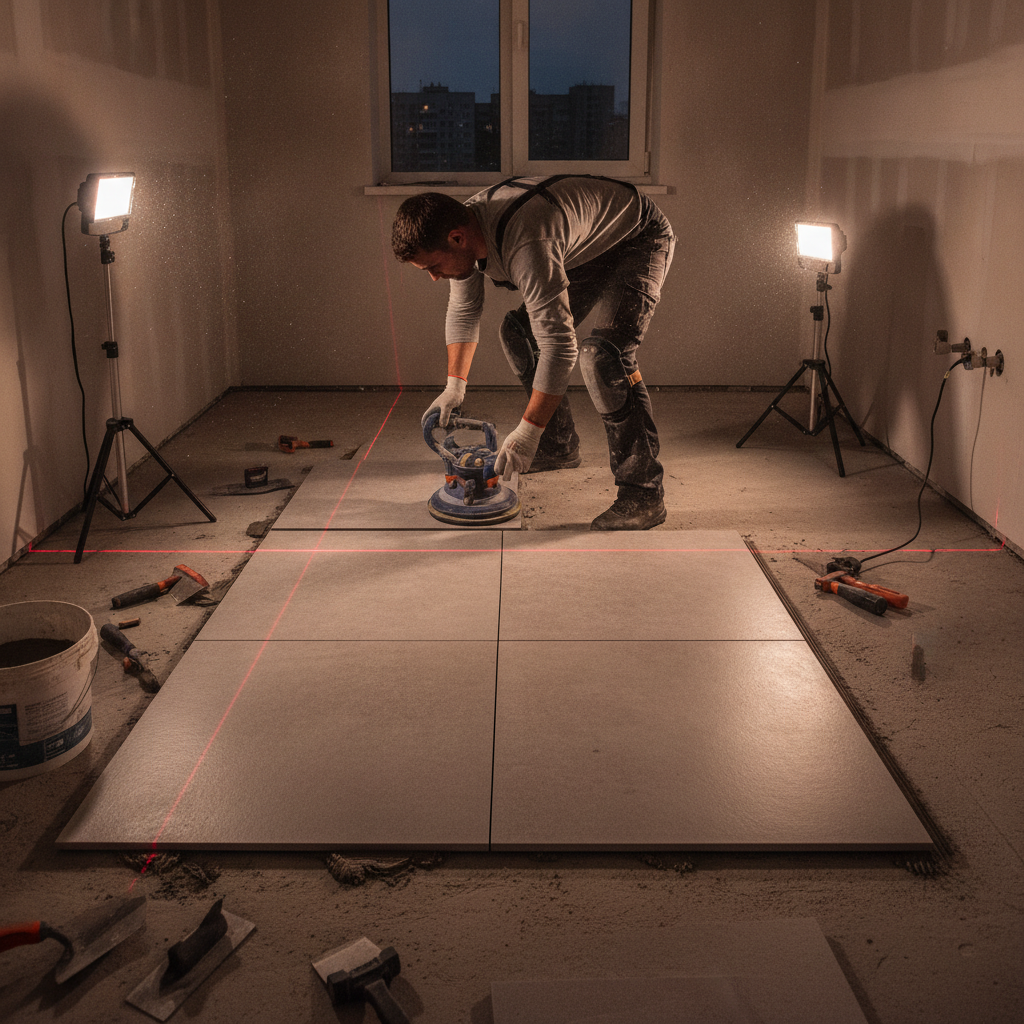
- Set floor tile: Back‑butter large‑format pieces and collapse ridges with directional troweling to improve coverage.
- Cuts and edges: Use a wet saw for clean cuts; finish with edge trims or bullnose where needed.
- Grouting: Select grout type to match joint size and maintenance needs; pack joints firmly and clean in stages.
- Sealing and caulking: Seal cementitious grout if specified; apply 100% silicone at changes of plane and along tubs.
- Cleanup and protection: Remove haze, protect floors with breathable covers, and post drying times.
- Quality check and handover: Inspect alignment, lippage, coverage indicators, and cure times. Document with photos and punchlist close‑out.
For turnovers, we stage materials so that multiple bathrooms can move through this sequence in parallel without crowding corridors.
Types, Materials, and Layout Methods
Choose porcelain for durability, matte finishes for traction, and patterns that minimize waste. In rentals, neutral tones and simple layouts reduce install time and future matching issues. Large‑format floors speed coverage; mosaics add grip on slopes and shower pans.
Material and pattern choices affect speed, safety, and maintenance across your buildings.
Common tile options
- Porcelain: Dense, low‑absorption, excellent for wet areas and heavy cleaning.
- Ceramic: Economical for walls and low‑impact areas; pair with quality grout and sealant strategy.
- Mosaics: Great for shower pans and slopes; more grout lines increase traction.
- Large‑format (e.g., 12×24): Fewer joints mean faster cleaning and a modern look.
Layout patterns that work in apartments
- Stacked: Clean, modern, fastest to install and align.
- Brick (1/2 or 1/3 offset): Hides small variances; check tile bowing recommendations for offsets.
- Herringbone (feature walls): High‑impact accent; use sparingly to control install time.
| Choice | Best Use | Pros | Watch‑outs |
|---|---|---|---|
| Porcelain | Floors, shower walls | Durable, low absorption | Heavier; needs strong mortar |
| Ceramic | Walls, surrounds | Lightweight, versatile | Higher absorption than porcelain |
| Mosaic | Shower bases, slopes | Great traction, conforms to pitch | More grout to maintain |
| Large‑format | Bathroom floors | Fewer joints, faster cleaning | Requires very flat substrates |
To align choices with your turnover goals, see our full unit turnover checklist and apartment renovation planning guide.
Best Practices for Multi‑Unit Bathroom Tiling
Standardize specs, protect occupied spaces, and document everything. Use one membrane system across properties, neutral SKUs, epoxy or stain‑resistant grout, and silicone at planes. Batch work by stack to limit noise and elevator time, and photograph every waterproofing step for records.
Specification standards that pay off
- Single‑system waterproofing: Use compatible backer, membrane, and sealants portfolio‑wide.
- Neutral finishes: Matchable tiles reduce future procurement friction.
- Grout strategy: Select stain‑resistant or epoxy grout in high‑use areas to minimize service calls.
Execution controls for occupied buildings
- Stack scheduling: Work vertically to consolidate noise and site protection.
- Dust and debris control: Wet‑cutting, vacuum attachments, and daily corridor cleaning.
- Tenant communication: Notice lead times, quiet hours, and water shutoff windows.
These controls mirror our occupied bathroom remodeling guidance and keep common areas clean during multi‑unit pushes.
Tools and Resources
Efficient apartment bathroom tiling relies on the right tools—leveling systems, notched trowels, wet saws, vacuums with HEPA filters—and clear documentation. Maintain checklists for substrate, membrane, and grout milestones, then archive photos to support warranty and portfolio QA.
Essential tools
- Laser level, chalk/laser lines, and straightedges
- Notched trowels matched to tile size; margin trowel
- Tile cutter and wet saw with clean water management
- Rubber float, sponges, buckets, microfiber towels
- Kneepads, spacers, wedge/clip leveling aids
- HEPA vacuum, plastic sheeting, and surface protection
Documentation to reduce callbacks
- Substrate condition photos before covering
- Membrane coverage and overlaps at corners
- Ledger lines, layout centering, and edge details
- Grout and silicone applied, with cure times posted
- Final lippage and alignment checks at handover
For general tile‑setting overviews, see this tile installation overview. And for renovation plumbing coordination considerations, this bathroom plumbing guide outlines fixture planning at a high level.
Troubleshooting: Diagnosing and Fixing Common Tile Issues
Most tile issues trace to substrate movement, weak coverage, or missing waterproofing. Diagnose with tap tests for hollows, straightedges for lippage, and moisture checks at tub edges. Fixes often involve re‑setting affected tiles, sealing perimeters, or re‑membraning localized zones.
Frequent issues we resolve
- Hollow sounds or loose tiles: Lift and reset with proper back‑buttering; verify mortar coverage in wet zones.
- Lippage and misalignment: Re‑set tiles out of plane; use clip systems to control movement during cure.
- Cracked or stained grout: Replace failed grout; consider stain‑resistant formulas in high‑use areas.
- Leaks at tub edge: Remove failed caulk; re‑caulk with 100% silicone and inspect membrane laps.
- Mold at corners: Improve ventilation, switch to silicone at planes, and clean with approved methods.
Cleaning speeds turnover. For simple upkeep ideas, here are practical bathroom cleaning tips you can adapt to tenant move‑out checklists.
Case Studies and Examples
Standardized tile assemblies shorten turnovers and cut maintenance tickets. In London mid‑rises, neutral porcelain with stain‑resistant grout improved showings and reduced cleaning time. Phased scheduling allowed work in occupied stacks without corridor crowding or excessive noise.
London mid‑rise turnover batch
We upgraded 10 washrooms across two floors in a London mid‑rise. Neutral 12×24 matte porcelain on floors and stacked ceramic on walls delivered a modern, consistent look. With batch procurement and vertical scheduling, units re‑opened on a predictable cadence.
Occupied refresh with quiet‑hour work
In an occupied apartment stack, we coordinated wet cuts and loud tasks into short, posted windows. Quiet layout and setting proceeded during daytime hours, keeping tenant complaints low while protecting hallways and elevators.
Emergency shower surround replacement
After a leak, our team stabilized the area, replaced compromised backer, re‑membraned the surround, and re‑tiled with stock‑matched pieces. The stack remained accessible, and the affected unit returned to service quickly.
Explore related planning and turnover resources in our unit turnover checklist and London washroom remodeling guide.
Frequently Asked Questions
Property managers ask about timing, occupancy, materials, and mold prevention. Expect 24–48 hours before light use after grouting, plan quiet‑hour work in occupied stacks, choose durable porcelain with stain‑resistant grout, and use silicone at planes with good ventilation to deter mold.
How long does apartment bathroom tile installation take?
Timelines vary by scope, but a typical tub surround and floor can progress from prep to grout in several working days, plus cure windows. Plan 24–48 hours after grouting before light use. Stacking similar units lets managers phase access with minimal corridor disruption.
Do residents need to vacate during tiling?
In most cases, no. With tenant‑friendly scheduling, dust controls, and posted quiet hours, work can proceed while residents stay in place. We coordinate short water shutoffs and protect common areas to reduce inconvenience.
What tile and grout are best for rentals?
Dense porcelain with matte finishes performs well under heavy cleaning. On walls, quality ceramic is reliable. Pair with stain‑resistant or epoxy grout to minimize service tickets. Keep colors neutral so replacements match stock easily in the future.
How do you prevent mold in wet areas?
Start with proper waterproofing behind the tile, then use 100% silicone at changes of plane and maintain ventilation. Encourage regular cleaning, and reseal cementitious grout as specified. If mold appears at corners, improve airflow and replace failed caulk.
Conclusion and Next Steps
Apartment bathroom tile succeeds when prep, waterproofing, and standardized specs meet tenant‑friendly scheduling. Use a documented 12‑step flow, neutral materials, and clear QA to hand over clean, durable, move‑in‑ready units—on repeat—across London, ON portfolios.
Key takeaways
- Standardize assemblies and finishes across properties to speed turnovers.
- Protect occupied buildings with dust, noise, and access controls.
- Choose durable porcelain, stain‑resistant grout, and silicone at planes.
- Document membranes, layouts, and QA to reduce callbacks.
Action steps
- Book a site assessment to baseline substrates and ventilation.
- Approve a single waterproofing system and neutral tile SKUs for your portfolio.
- Phase a pilot stack to validate schedule and inspection flow.
Ready to refresh bathrooms across your units? Start with our turnover checklist or connect via our contact page to schedule an on‑site assessment in London.