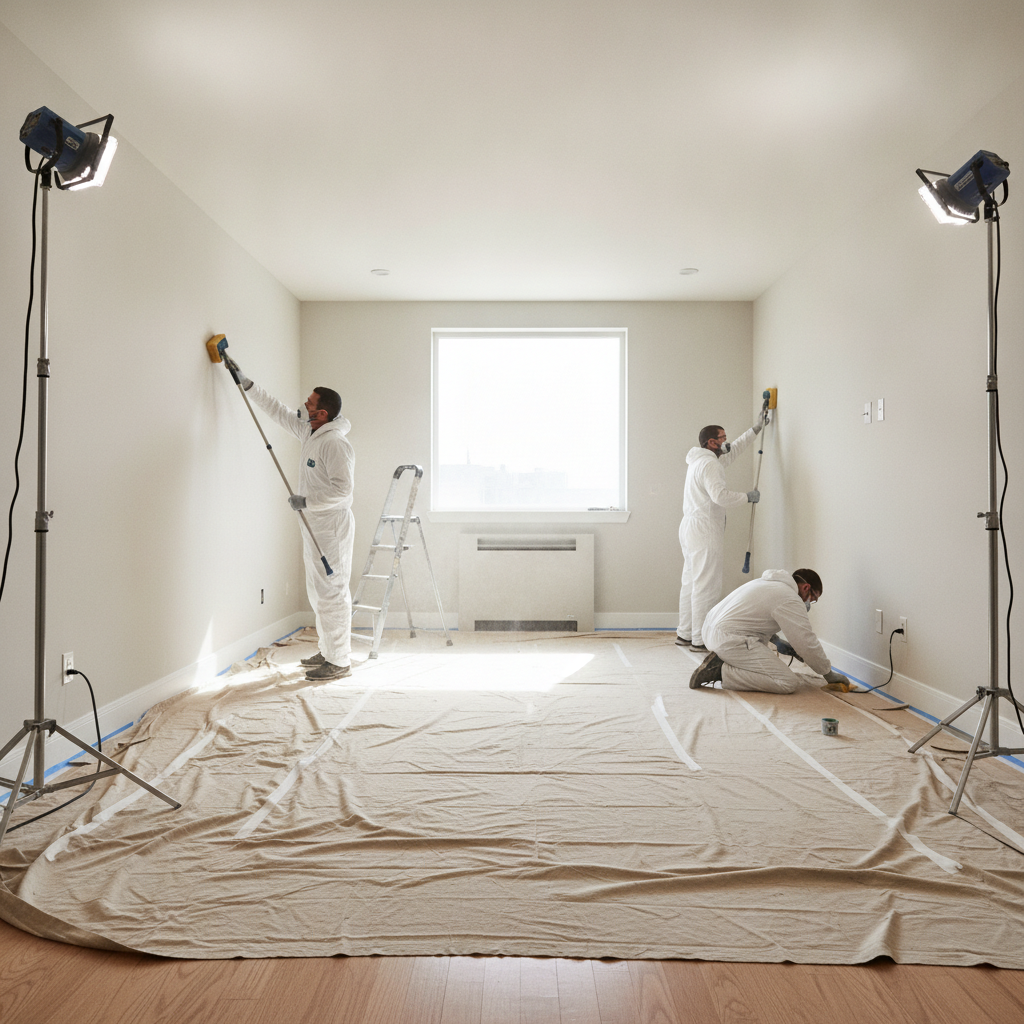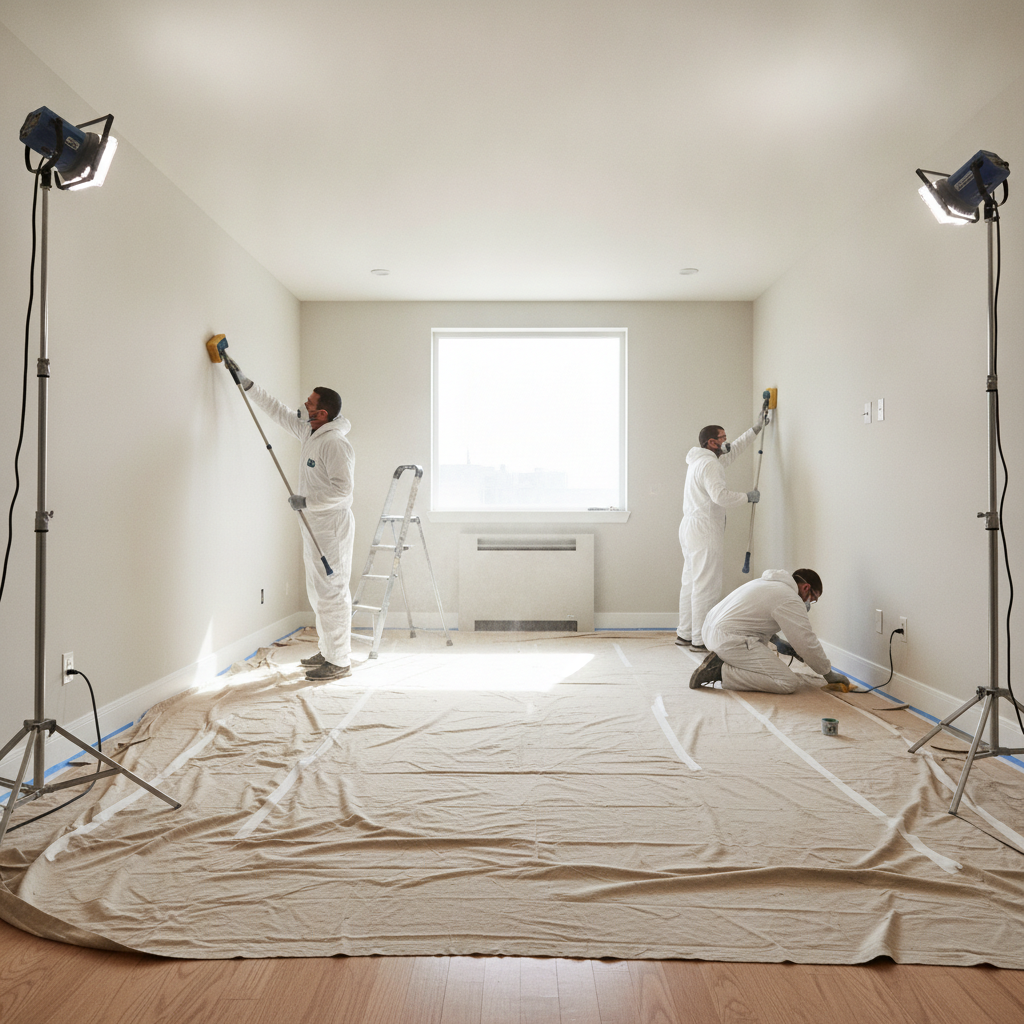
Surface preparation before repainting rentals is the systematic cleaning, repair, deglossing, and priming of walls, ceilings, and trim to ensure new paint bonds and looks uniform. Done right, it reduces rework, speeds turnovers, and produces a durable finish across multi-unit buildings in London. For property managers, this is the fastest path to move-in-ready units.
By Mahal Concrete and Constructions • Last updated: 2026-06-28
At a Glance: Surface Prep Essentials
Effective surface prep in rentals means clean, sound, dull, and dry substrates before you paint. Standardize steps—inspection, cleaning, repairs, sanding, masking, and priming—to cut touch-ups and vacancy days. In our experience across London multi-unit buildings, preparation drives 70% of paint results and keeps schedules on track.
Use this quick-hit overview to align your turnover team and vendors. It clarifies why prep matters, how to run it at scale, and the tools that keep units on schedule.
- What you’ll learn: definitions, risks, methods, checklists, and QA.
- Who it’s for: property managers, landlords, and apartment owners handling multiple doors.
- Why now: predictable prep cuts rework hours and accelerates leasing by days.
Local considerations for London
- Winter humidity swings: Plan longer dry times and ventilation in colder months; interior RH can dip below 30%, affecting patch cure and caulk movement.
- High-traffic student turnover: Schedule standardized color and sheen packages for fast summer changeovers.
- Occupied properties: Use low-odor products with HEPA dust control to protect residents while work proceeds.
What Is Surface Preparation Before Repainting Rentals?
Surface preparation before repainting rentals is the structured process of cleaning, repairing, deglossing, and priming interior surfaces so new coatings adhere and level properly. It eliminates contaminants, fixes damage, and creates a uniform, dull profile. In multi-unit buildings, standardizing these steps enables consistent finishes across dozens of identical units.
In rental turnovers, prep is not one task—it’s a sequence. The goal is a clean, sound, dull, and dry surface. We’ve found that when this standard is enforced at every door, paint glides on evenly, covers in fewer coats, and resists premature scuffs.
- Clean: Remove dust, nicotine, cooking residue, and hand oils. Target visible gloss, especially on trim.
- Sound: Fix loose tape seams, failed caulk, popped fasteners, and soft drywall.
- Dull: Scuff glossy paint and hard enamels; 180–220 grit is typical for walls and trim.
- Dry: Ensure patches and primer meet manufacturer dry times; aim for no dust transfer on a white cloth.
Because many London apartments share repeated layouts, Mahal Concrete and Constructions builds prep checklists that replicate across stacks and floors. That consistency helps reduce punch-list items per unit and shortens vacancy periods during peak turnover windows.
Why Proper Prep Matters for Rental Turnovers
Proper prep prevents adhesion loss, flashing, and visible patch edges—the top drivers of repaint rework. It also shortens turnover timelines by reducing callbacks. In multi-unit settings, standardized prep ensures color and sheen match across units, helping lease listings photograph better and rent faster.
Here’s the thing: painting failures rarely start with paint. They start with surfaces. A quick wipe and a fresh coat looks fine for a day, then telegraphs defects. We’ve seen rework drop sharply when teams follow a checklist.
- Adhesion insurance: Deglossing and compatible primer prevent peel/scratch failures that appear within 24–72 hours.
- Uniform appearance: Spot-primed patches and feathered sanding avoid “flashing” under LED lighting.
- Fewer touch-ups: A dust-free, dull profile reduces roller/brush drag and lap marks by noticeable margins.
- Faster leasing: Photo-ready walls and trim help units market sooner; even a two-day gain adds up across portfolios.
- Safety and compliance: HEPA capture and low-odor products protect residents and staff in occupied buildings.
For a broader turnover plan beyond paint, see our full unit turnover checklist. It pairs naturally with standardized paint systems and surface preparation before repainting rentals to compress timelines.
To compare exterior-oriented prep concepts with interior fundamentals, review this concise prep checklist for context; the control points—clean, repair, prime—carry indoors, too.
How Surface Preparation Works: Step-by-Step
Run prep as a repeatable workflow: assess, clean/degrease, repair, sand, dust-control vacuum, prime, caulk, mask, and verify. Use measurable checkpoints—grit numbers, dry times, and lint-free wipe tests—to keep crews aligned. This sequence reduces callbacks and lets you batch units floor-by-floor.
Below is a proven turnover sequence we use across London multi-unit properties. Numbers keep everyone honest; crews can see and meet the same standard door after door.
- Unit assessment (30–45 minutes): Mark repair zones, moisture risks, and high-gloss trim. Photograph existing conditions.
- Dust control set-up (10–15 minutes): Poly off sensitive zones; place mats; stage a HEPA vac with 0.3 µm filtration at 99.97% efficiency.
- Cleaning and degreasing (20–40 minutes/room): Use a TSP substitute; rinse with clean water; target kitchens and switch plates.
- Repairs (variable): Tighten fasteners; reset popped screws; patch with setting compound on larger areas; skim and feather 8–12 inches.
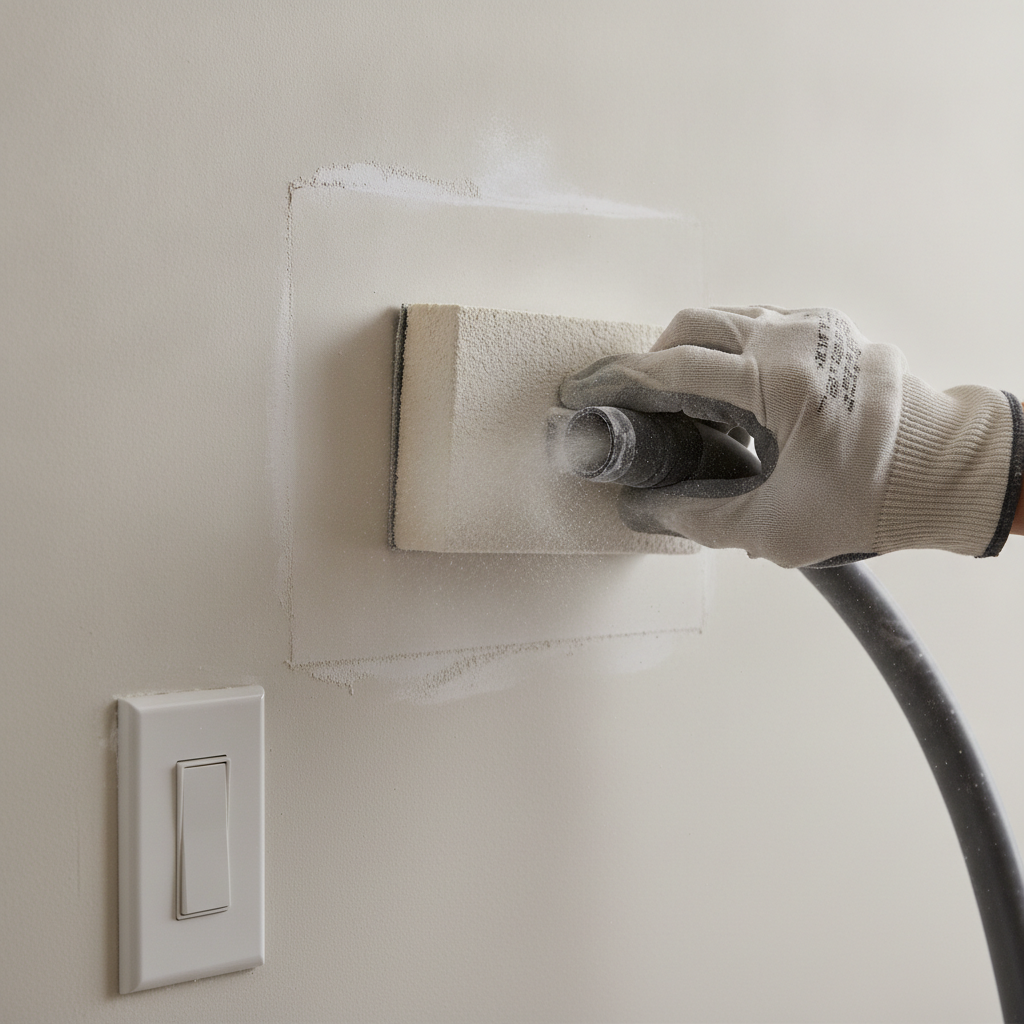
- Scuff sanding (20–30 minutes/room): 180–220 grit for walls; 120–150 for trim/enamels; vacuum dust immediately.
- Stain/odor blocking: Spot-seal nicotine, marker, or water rings with a dedicated primer.
- Masking (15–25 minutes/room): Tape trim edges; mask hardware; drop cloth entire traffic lines.
- Priming: Use bonding primer on glossy areas and repairs; typical recoat windows are 1–4 hours for waterborne products.
- Caulking: Flex gaps at trim/wall joints with a paintable acrylic latex; tool smooth; allow skin time per label.
- Final wipe and check: Tack cloth on ledges; white-cloth test shows no dust transfer; address snags immediately.
| Step | Key Tool/Material | Measured Outcome |
|---|---|---|
| Cleaning | TSP substitute + microfiber | Grease-free; water beads no longer present |
| Repair | Setting compound + 10″ knife | Feathered edge 8–12″; no ridges under raking light |
| Scuff sand | 220-grit pole sander | Uniform dullness; no gloss patches |
| Prime | Bonding or stain-block primer | Spot-primed repairs sealed; no telegraphing |
| Mask | Tape + paper/plastic | Trim edges protected; outlets covered |
| QC | White-cloth dust check | No dust transfer; ready for topcoat |
For help deciding when a wall needs repair versus full skim, our guide on wall repairs before apartment repainting explains the thresholds we use in turnovers.
Types of Surfaces and Prep Methods in Rentals
Match prep methods to the surface. Drywall needs cleaning, patching, and light scuff-sanding. Trim and doors require stronger deglossing and bonding primer. Kitchens and baths demand degreasing and stain/odor blockers. Consistency across unit types keeps color and sheen uniform in photos and walkthroughs.
Drywall and ceilings
- Common issues: nail pops, hairline cracks, suction marks, and roller texture from past jobs.
- Method: Set screws; fill with setting compound; feather 8–12″; sand 220 grit; spot-prime.
- Numbers to watch: many waterborne primers recoat in 1–4 hours; allow 24 hours before aggressive tape masking.
Trim, doors, and cabinets
- Common issues: glossy alkyds, finger oils on pulls, and chipped edges.
- Method: Degrease; scuff 120–150 grit; dust-vac; apply a bonding primer; use a durable enamel topcoat.
- Tip: On high-touch areas, a light second scuff after primer improves enamel laydown and early block resistance.
Kitchens and baths
- Common issues: steam, mild staining, and localized odors from cooking or cleaners.
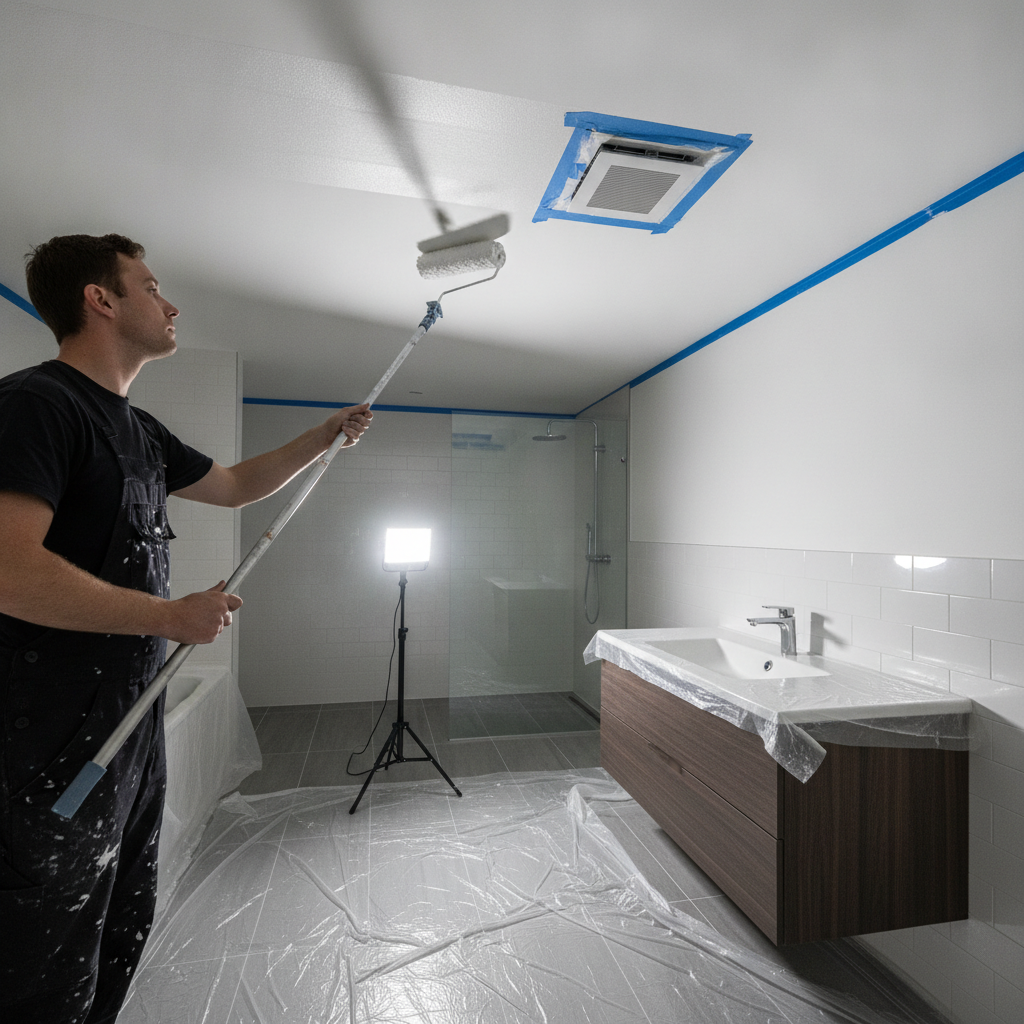
- Method: Thorough degreasing; stain/odor-block primer on ceilings and above cooktops; use flexible caulk at tub/shower transitions.
- Ventilation: Keep airflow steady for 2–4 hours after priming to move moisture and odors out.
If you want a short primer on kitchen coating preparation, this overview of kitchen respraying prep shows how degreasing and bonding primer influence adhesion on slick surfaces.
When repainting is paired with minor repairs or upgrades, coordinate with our paint and repairs turnover approach so trades don’t overrun each other. We stage repairs first, then prep, then coatings—no pileups, no lost days.
Best Practices and Checklists for Multi-Unit Properties
Standardize your prep inputs—colors, sheens, primers, and patch compounds—then lock a room-by-room checklist. Document with photos under the same lighting. This cuts color drift, flashing, and callbacks. In multi-unit buildings, identical SKUs and steps let you batch materials and training, speeding every subsequent turnover.
Standardize the system
- Colors: Fix a neutral palette for walls, trim, and ceilings to avoid stockouts and mismatches.
- Sheens: Eggshell for walls, semi-gloss for trim and doors, and flat for ceilings are common rental standards.
- Primers: One bonding primer and one stain/odor blocker cover 90% of turnover needs.
- Compounds: Keep one fast-setting patch and one lightweight finishing mud on every cart.
Run a repeatable checklist
- Assess, mark, and photograph every repair area before work begins.
- Degrease, rinse, dry, then scuff; vacuum and tack before primer.
- Spot-prime repairs and stains; verify no flashing under raking light.
- Mask edges precisely; remove tape within the recommended recoat window.
Quality gates and documentation
- QC photo log: Two angles per room post-primer and post-topcoat under the same lighting.
- White-cloth dust test: No transfer on sills, baseboards, or switches before painting.
- Low-VOC target: Prefer paints under 50 g/L VOC to minimize odor in occupied buildings.
For context on where prep fits inside a broader plan, see our apartment turnover process. It shows how surface preparation before repainting rentals pairs with cleaning, fixture swaps, and final handover steps.
Tools and Materials That Speed Safe Prep
Equip crews with HEPA vacuums, pole sanders, bonding and stain-block primers, flexible caulk, fast-setting compounds, and low-odor cleaners. The right tools compress hours and protect residents. Standard carts reduce missing-item delays—one cart per door keeps momentum and quality high.
- HEPA vacuum: 0.3 µm at 99.97% capture reduces dust cleanup and respiratory risks.
- Pole sander + abrasives: 180–220 grit for walls; 120–150 for trim.
- Primers: Bonding primer for glossy areas; stain/odor blocker for spots, especially in kitchens and baths.
- Compounds: Fast-setting patch for deep fills; lightweight compound for feathering.
- Caulk: Paintable acrylic latex for gaps; tool to a smooth, consistent bead.
- Cleaners: TSP substitute or degreaser; rinse with clear water.
- PPE: Respirators as needed, eye protection, and gloves—critical in occupied properties.
To see how prep discipline affects finish results in high-use areas, this interior painting overview illustrates why adhesion and stain control are non-negotiable in kitchens and baths.
We synchronize tools and materials with our paint-and-repairs workflow so painters don’t wait on patchers and vice versa.
Quality Control: How to Measure Prep Success
Verify prep with simple field tests: white-cloth dust check, crosshatch adhesion on a primed patch, and raking-light inspection for flashing. Document with photos and a two-signoff system. These controls keep standards consistent across units and cut callbacks during leasing.
- Dust check: Wipe a white cloth across sills and switches; any gray shows more vacuuming or tack-wiping is needed.
- Adhesion spot test: On a discrete primed patch, apply tape and pull; flaking signals more deglossing or a different primer.
- Raking-light scan: Hold a work light low across walls to reveal ridges or patch telegraphing.
- Moisture awareness: Avoid priming over damp repairs; give setting compounds their full cure window.
- Final checklist: Two-person signoff at turnover reduces follow-up tickets after move-in.
Case Studies: Real-World Examples from London Multi-Unit Buildings
Standardized prep trims days from turnovers. Across three London properties, we cut callbacks by enforcing the same clean–repair–scuff–prime sequence. The result: fewer touch-ups, uniform photos for listings, and move-in readiness aligned with leasing timelines—even during peak season.
Stacked one-bedrooms, downtown corridor
- Challenge: Heavy hand oils on doors and frames; visible roller lap marks.
- Action: Degrease, scuff 150 grit on trim, bonding primer, enamel topcoat.
- Result: Adhesion issues dropped to near-zero; trim uniformity improved leasing photos across 12 similar units.
Family-focused mid-rise, west side
- Challenge: Popped fasteners and patch flashing in kids’ rooms.
- Action: Reset screws, setting compound, 220-grit feather, spot-prime, eggshell walls.
- Result: Fewer punch items per door and faster signoffs at handover.
Student turnover block
- Challenge: Summer surge with high-odor sensitivity in occupied adjacent units.
- Action: Low-VOC coatings, HEPA capture, odor/stain-block on ceilings.
- Result: Predictable schedules and fewer smell complaints while adjacent residents remained comfortable.
If you coordinate multiple trades, our guide to hiring a turnover pro explains how prep, paint, and repairs align to reduce vacancy days.
Frequently Asked Questions
These concise answers cover the prep checkpoints property managers ask about most. Use them to align expectations with vendors and onsite teams so schedules and quality targets stay consistent across every unit.
What is the fastest way to prep apartment walls for repainting?
Work in this order: protect, clean/degrease, repair, scuff-sand, vacuum, spot-prime, and mask edges. Keep one standardized cart per unit so tools never go missing. A white-cloth dust test before primer prevents most rework.
Do I need to prime the entire wall after patching?
Spot-prime patches and stains at minimum. Full-wall primer helps when there’s heavy scuffing, color changes, or unknown prior coatings. If you see flashing under raking light after spot-priming, roll a full coat of primer for a uniform finish.
What grit sandpaper should I use on rental walls and trim?
Use 180–220 grit for walls and ceilings to create a light scuff without scratches. On trim and doors finished with old enamels, 120–150 grit is typical before applying a bonding primer. Always vacuum dust and tack-wipe before priming.
How do I prevent paint odor complaints in occupied buildings?
Choose low-VOC products, ventilate with fans, and schedule higher-odor tasks earlier in the day. Use HEPA vacuums during sanding to cut dust. Communicate timelines to residents and maintain clean corridors to minimize disruption.
Conclusion and Next Steps
Prep is your schedule stabilizer. Standardize clean–repair–scuff–prime, enforce simple field tests, and document with photos. In London’s multi-unit market, those habits cut rework and vacancy days—and produce finishes that show well online and on walkthroughs.
Key takeaways
- Surface preparation before repainting rentals determines most of your finish quality.
- Use measurable checkpoints—grit numbers, dry times, and dust tests—to align crews.
- Standardize SKUs, sheens, and steps to repeat success across every door.
- Document with lighting-consistent photos to control quality and training.
Action steps
- Adopt the step-by-step sequence in this guide and post it at job-start.
- Build a unit prep cart with HEPA, abrasives, primers, and compounds.
- Schedule a floor-by-floor batch so trades don’t collide.
- Book a turnover assessment to tailor checklists to your buildings.
Need a fast, consistent turnover in London?
Our WSIB-compliant team specializes in multi-unit prep, paint, and repairs with tenant-friendly scheduling. Let’s align your color standards, primer choices, and QC gates so every door shows the same. Contact our team to get started.