
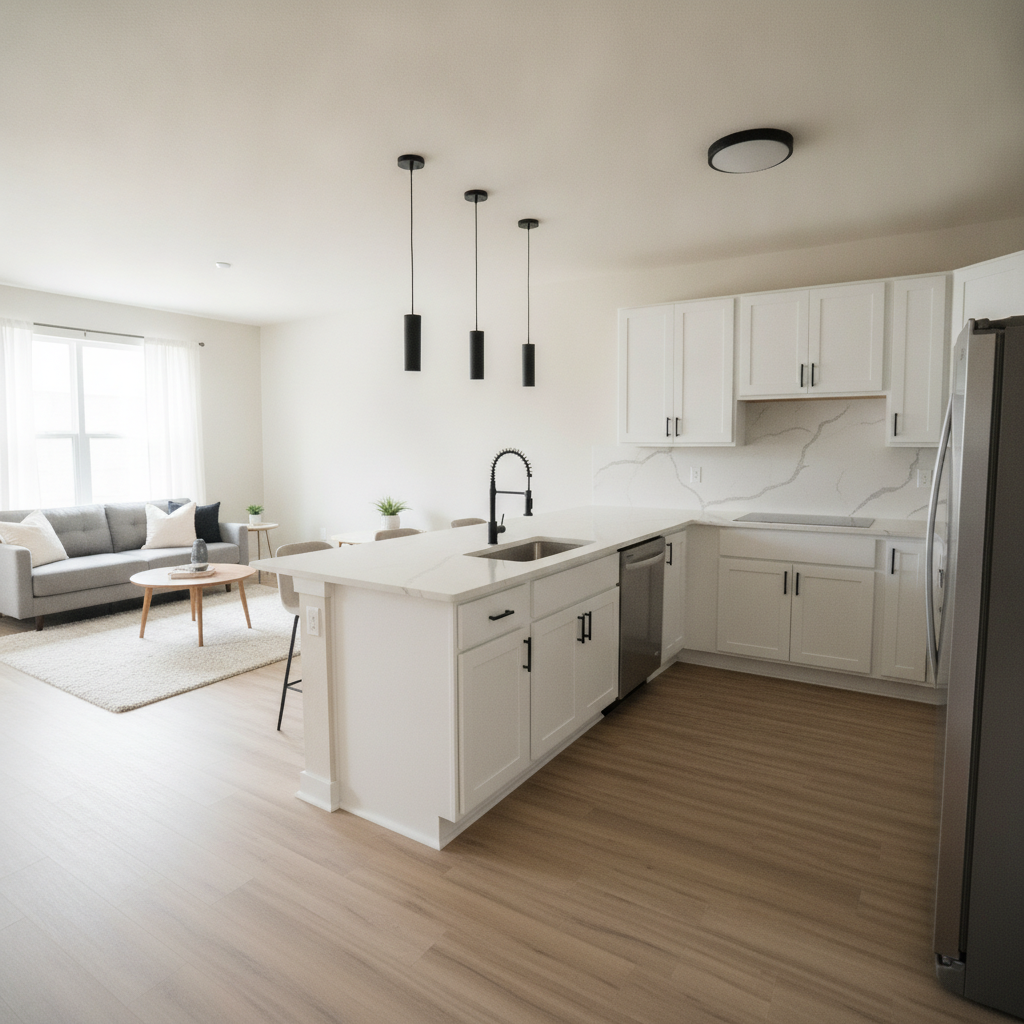
Vacant days hurt. Tenants still occupy neighboring suites. Inspectors have tight windows. A clear, repeatable finish standard removes friction: one paint system, one flooring line, one kitchen and bath package. Our crews know the sequence, your team knows what’s coming, and units get listed faster.
By Mahal Concrete and Constructions · Last updated: 2026-07-12
| Service area | London and Southwest Ontario (regional portfolios supported) |
|---|---|
| Core services | Full Unit Turnover; Kitchen & Bathroom Remodeling; Flooring & Tiling; Paint & Repairs; Cleaning & Finishing; Emergency stabilization |
| Hours | Mon–Fri, 8:00–17:00 |
| Compliance | Fully insured, WSIB‑compliant; safety‑first in occupied buildings |
| Track record | 500+ projects; 50+ years combined team experience |
| Process | Site assessment → Proposal & timeline → Scheduled execution → Quality check & handover |
Local tip for London property managers
Summer turnover season strains supplier inventory across London. We pre‑reserve one wall color, one LVP line, and one hardware set for clients so suites don’t stall mid‑turn when racks run light. Ask about buffer stock for peak months.
What Are Standardized Finishes and Why Multi-Unit Landlords Need Them
Standardized finishes are fixed, repeatable selections for paint, floors, cabinets, tile, fixtures, and hardware. One playbook means faster turns, cleaner inspections, simpler reorders, and consistent photos for listings. Your team stops re‑deciding. Crews stop guessing. Units hit the market sooner.
In our experience, the fastest turns follow a written, one‑page spec with SKUs and install notes. A few years back, a 12‑unit mid‑rise in east London had three different LVP lines across floors. Crews cut odd transitions in every suite and we lost two days. A single floor line would have prevented it.
| Approach | Typical outcome |
|---|---|
| Spec‑first (one page, fixed SKUs) | Shorter vacancy window, fewer punch‑list items, easier maintenance |
| Ad‑hoc (case‑by‑case) | Ordering delays, mismatched finishes, rework after inspections |
For the full turnover roadmap, see our unit turnover checklist and final handover checklist.
Quick Summary
Choose one neutral wall color, one mid‑tone LVP line, a matching trim and door set, and repeatable kitchen and bath packages. Publish a one‑page spec, pre‑reserve stock, train trades, and QA every unit. That’s the formula for predictable, move‑in‑ready suites.
- Goal: Reduce vacancy days with consistent, durable finishes.
- Scope: Paint, flooring, trim/doors, lighting/electrical, kitchen, bath, hardware, cleaning & finishing.
- Docs: One‑page spec + turnover scope; both live in your work orders.
- QA: Five‑minute checklist before keys return prevents most callbacks.
The Core Finish Categories to Standardize Across Every Unit (7 Tips)
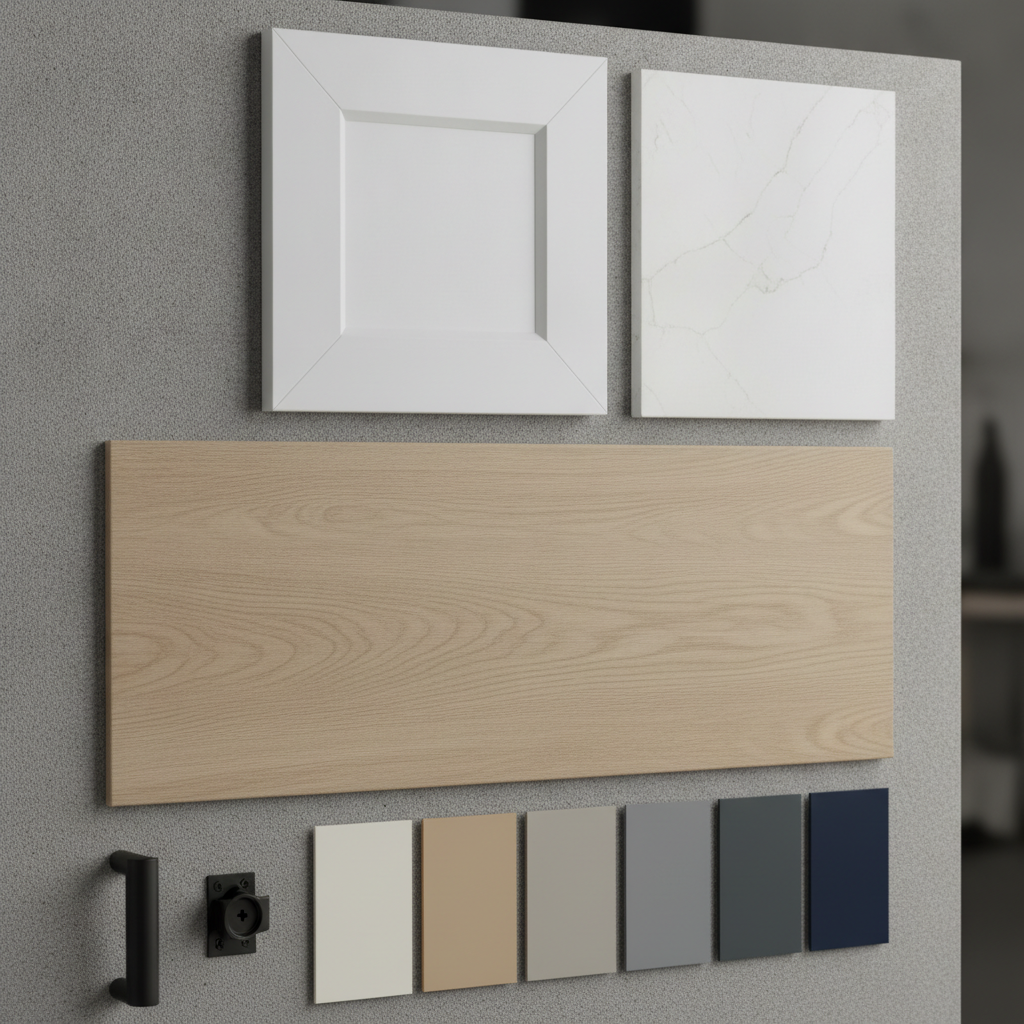
Standardize seven items—paint, flooring, trim/doors, lighting/electrical, kitchen package, bath package, and hardware/caulk. One choice per category drives speed and quality. Document the color code, SKU, and any install nuance.
- Paint (single interior system): Walls in eggshell/satin, trim/doors semi‑gloss. Use one warm neutral and publish the code. We include wall repairs and patchwork before painting to avoid telegraphing seams.
- Flooring (one LVP line): Mid‑tone plank with a 20‑mil wear layer and matching transitions. We undercut door casings and keep felt pads handy for move‑ins.
- Trim & doors: Consistent MDF profiles and lever hardware for accessibility. Keep spare levers on site to reduce service calls.
- Lighting & electrical: LED flush mounts at 3000–3500K, GFCIs in wet zones, tamper‑resistant receptacles in family units. Standardize plate style.
- Kitchen package: Shaker cabinet replacements where required, quartz‑look countertops, one subway tile and grout color. Soft‑close hinges across suites.
- Bath package: Large‑format porcelain tile with leveling spacers, mildew‑resistant paint, and one faucet/shower trim line for easy parts management.
- Hardware & sealants: Matte black or brushed nickel throughout. One brand of silicone and caulk for consistent cures and color.
We align these tips to our turnover scope template so work orders match the field reality.
Room-by-Room Finish Specifications: A Practical Framework
Keep materials continuous: same wall color, same LVP, matching trim, and fixed kitchen/bath packages. One page covers walls, floors, cabinets, counters, tile, and fixtures—what to use and how to install it.
Kitchen
- Cabinets: Standardized shaker profile; cabinet replacements prioritized over patchy door swaps.
- Counters: Quartz‑look surfaces with a square edge; avoid mixing edge styles floor‑to‑floor.
- Backsplash: One subway tile, one grout. Keep spares boxed in the building.
- Flooring: Carry the LVP through for a seamless, mop‑friendly surface.
- Hardware: One pull size and finish across all doors/drawers.
Plan your next kitchen turnover using our kitchen turnover checklist—it shows the exact sequencing we use to avoid rework.
Bathroom
- Tile: Large‑format porcelain with leveling clips; one grout color that hides wear.
- Fixtures: Water‑saving trim set and toilet line; keep a few cartridges in maintenance stock.
- Walls/Ceiling: Mildew‑resistant paint; clean fan housings; standardized mirror/vanity.
Living/Bedrooms
- Paint: One neutral throughout; touch‑up friendly.
- Floors: LVP everywhere practical; transitions only where code or structure requires.
- Doors/Trim: Uniform profile and lever sets; semi‑gloss for durability.
For occupied buildings, our apartment turnover process details dust control, quiet hours, and daily cleanup so neighbors aren’t impacted.

How to Roll Out a Finish Standard Across Your Building (Step-by-Step)
Pilot one vacant suite, finalize SKUs, publish a one‑page spec, and pre‑reserve stock. Train trades on sequencing, then enforce a five‑minute QA at handover. Update the standard quarterly based on punch‑list data.
- Assess: Walk representative suites. Note recurring failures—loose tile, swollen bases, worn LVP.
- Pilot: Install your full set in one unit; get feedback from leasing and maintenance.
- Document: Lock SKUs, color codes, and install notes in a one‑page spec.
- Procure: Stage buffer stock on site (paint, LVP, hardware). Add Cleaning & Finishing consumables.
- Train: Brief vendors; sequence repairs and upgrades before finishes.
- Execute: Use our final handover checklist so inspectors breeze through.
- Refine: Quarterly spec review; retire weak SKUs and document better ones.
Need proposal language that matches your standard? Grab our renovation proposal checklist.
Common Mistakes Landlords Make When Standardizing Finishes
The biggest misses: over‑customizing, mixing brands, skipping repairs, and not writing the spec. Keep one choice per category, complete baseline repairs first, and publish the standard so every vendor follows it.
- Too many options: Tenant choice on paint or pulls slows orders and creates warranty headaches.
- Mismatched SKUs: Transitions, grout, and trim profiles vary by vendor—list exact SKUs.
- Skipping baseline work: Installing new floors over soft spots or painting over cracks guarantees callbacks. Tackle Repairs and Upgrades first.
- No Cleaning & Finishing plan: Smudged walls and dusty floors drag listing photos. Final clean is part of the standard.
- Emergency blind spots: Water events happen. Keep a small Emergency stabilization protocol—fans, dehumidifiers, and who to call—inside the spec.
We cover these pitfalls during contractor selection so your standard survives changes in vendors and staff.
Local Considerations for Apartment Finish Standards
London buildings often mix construction eras. Choose finishes that bridge legacy tile, trim profiles, and cabinet boxes. Standard packages should retrofit cleanly without layout changes and hide common wear patterns in high‑turnover corridors.
- Seasonal turnover spikes: Reserve SKUs early for summer move‑outs; stage deliveries in batches.
- Occupied suites: Use dust control, quiet tools, and end‑of‑day punch lists to respect residents.
- Legal Separate Entrance: When adding a code‑compliant suite, mirror the standard so new spaces match your portfolio from day one.
Local considerations for London
- Time standards with peak leasing months in London to shrink vacancy gaps.
- Plan deliveries around busy corridors and elevator bookings to keep hallways clear.
- Coordinate inspection timing early for entrance modifications and bathroom ventilation checks.
Frequently Asked Questions
Keep one finish per category, start with floors and paint, and write a one‑page spec vendors follow. Review it quarterly so standards stay aligned with maintenance realities and leasing feedback.
How many finish options should our building keep?
One per category. One wall color, one LVP line, one cabinet door style, one countertop, one tile, and one hardware finish. Decision speed improves, and field errors drop across vendors.
Where should we start if standards don’t exist yet?
Start with paint and flooring for immediate impact, then lock kitchen and bath packages. Pilot in one vacancy, document SKUs and install notes, and roll across the next three turns.
How do you keep consistency with different trades on site?
Publish a one‑page spec, hold a kickoff, and enforce a simple QA at handover. We also schedule Repairs and Upgrades before finishes to prevent rework.
Do standards apply to a new legal basement suite?
Yes. Apply the same paint, LVP, trim, and bath package so the new unit matches your portfolio. It simplifies inspections and makes maintenance stocking easier.
Need a one‑page spec you can hand to any vendor? We’ll build your apartment finish standard and pilot it in a single suite so you can see the difference on the next listing.
Book a quick assessment to align standards with your turnover goals.
Conclusion & Next Steps
Pick one durable, neutral finish set and repeat it. Write it down, train vendors, and stage buffer stock—especially for London’s summer turns. You’ll see faster handovers, cleaner inspections, and fewer maintenance surprises.
- Key takeaways: One choice per category, written spec, QA before keys return.
- Action now: Pilot the standard in one vacancy and measure listing speed.
- Support: We handle site assessment, Repairs and Upgrades, Cleaning & Finishing, and tenant‑friendly scheduling.
Ready to standardize finishes across your London portfolio? Schedule a discovery call and we’ll map your rollout.
For additional context on renovation logistics and finish coordination, see this apartment painting overview, a new‑construction finishes primer, and a condo renovation overview.