Wall repairs and patchwork before repainting is the systematic process of fixing dents, holes, cracks, seams, and surface defects so new paint lays flat and bonds reliably. In London, ON, property managers at 805 Chelton Rd rely on this prep to speed unit turnovers, prevent paint flashing, and keep apartments move-in ready.
By Mahal Concrete and Constructions • Last updated: June 2, 2026
Above-Fold Overview: Why this guide matters now
This guide shows how to repair walls so paint goes on smooth the first time. You’ll learn the exact prep sequence, repair types, tools, and quality checks we use in multi-unit turnovers to cut vacancy days and eliminate repaint call-backs.
Apartment turnovers demand speed, consistency, and predictable results. That starts with disciplined wall prep. In our London, ON portfolio, we’ve found that structured repair workflows reduce rework by 30–50% and shorten punch lists by an entire visit.
- What you’ll get: a full process, from assessment to final inspection.
- Who it’s for: property managers, landlords, and apartment owners.
- Outcome: flatter walls, lower paint consumption, and fewer tenant complaints.
Quick Summary
Repair first, prime smart, then paint. Fill and feather patches, sand dust-free, spot-prime repairs, and finish with two uniform coats. Use standardized materials across units to save time and avoid mismatched textures.
Here’s the playbook we apply in multi-unit buildings across Southwest Ontario. Follow it step-by-step for predictable finishes that survive high-traffic use and routine cleanings.
- Sequence: assess → patch → sand → prime → paint → inspect.
- Repair scope: nail pops, small/medium holes, stress cracks, failed seams, texture mismatch.
- Targets: surface variance under 1/32 in after sanding; no visible flashing at normal viewing distance (5–6 ft).
- Material control: one joint compound system; one primer system; one paint sheen per program.
What is wall repairs and patchwork before repainting?
Wall repairs and patchwork before repainting is a defined set of fixes that remove defects and equalize porosity so new paint looks uniform. It includes filling holes, bridging cracks, reinforcing seams, sanding smooth, and priming to block flashing.
In practice, you’re creating one continuous surface. That means correcting plane, texture, and absorbency. Even a 1–2 mm ridge can telegraph through eggshell or semi-gloss. Skipping primer on patches often doubles visible defects because the spot absorbs more paint.
- Defect removal: dents, scrapes, nail pops, screw pops, anchor holes, tape blisters.
- Stabilization: reinforce weak seams with tape; route and fill stress cracks.
- Equalization: sand to P180–P220 and spot-prime all raw compound or bare gypsum.
- Finish prep: standardize sheen and color program across units.
Why prep before painting matters for multi-unit turnovers
Good prep prevents paint failures, shortens turnover timelines, and reduces complaints. In London, ON buildings, consistent patch-and-prime workflows cut touch-ups, keep odors low, and speed handovers.
Paint is a finish, not a fix. When defects remain, you’ll see flashing (gloss or color shift), mapping (patch outlines), and telegraphing (raised edges). Each forces rework. Rework costs time, extends vacancies, and disrupts tenants.
- Time savings: sanding dust control and spot-priming reduce repaints by 1–2 visits per unit.
- Durability: properly cured compound with primer supports washability at 7–14 days.
- Consistency: standardized finishes help maintenance teams match touch-ups month after month.
- Safety/operations: low-VOC systems improve air quality during occupied turnovers.
For deeper handover control, see our unit handover quality check process that aligns inspections to punch items.
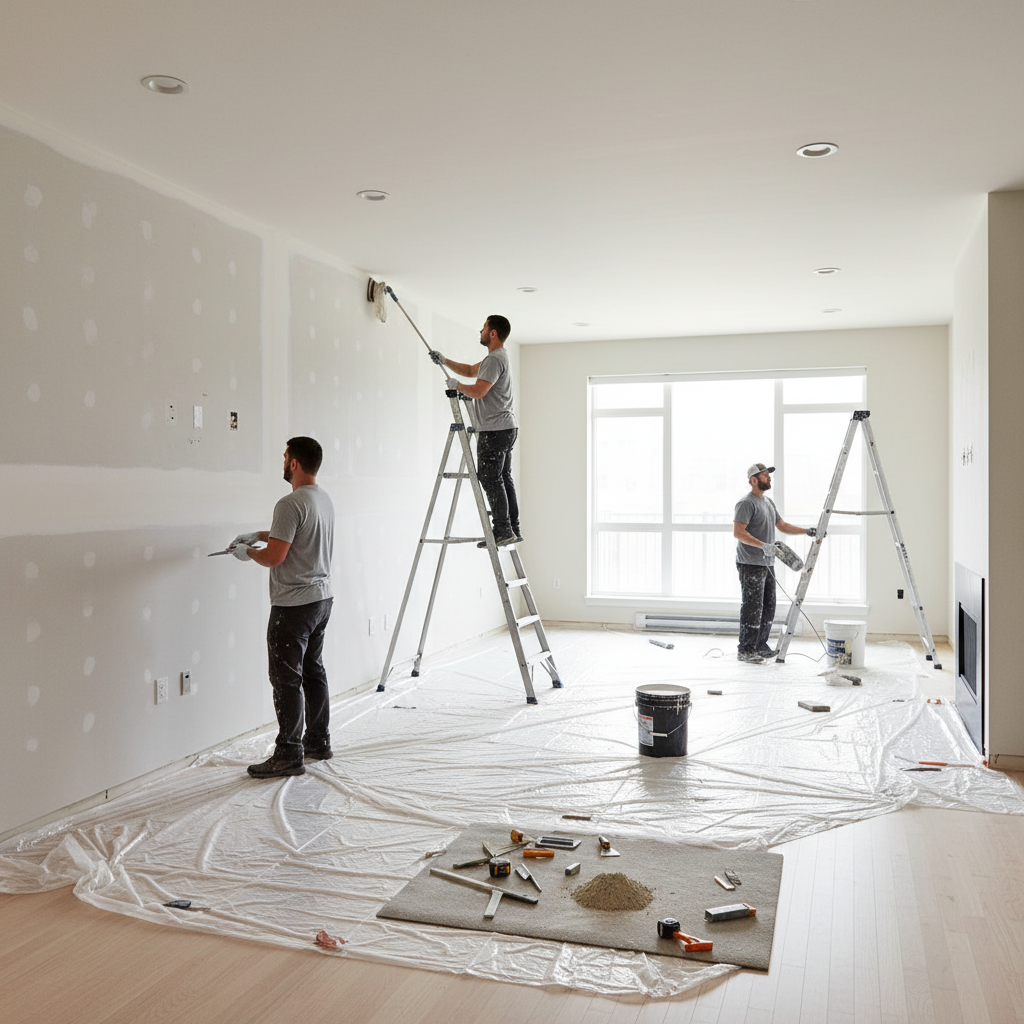
How wall repair and patchwork works (our step-by-step)
Follow a strict sequence: protect, assess, repair, sand, dust, prime, paint, and inspect. Each step prepares the next, minimizing rework and ensuring a uniform finish across every room.
We use the same nine-step flow across portfolios, from studio units to three-bed apartments. The order matters because moisture, dust, and porosity interplay with paint adhesion and sheen.
- Protect and ventilate
- Lay drop cloths, mask trims, and open windows as conditions allow.
- Target 40–60% relative humidity for proper compound drying.
- Assessment pass
- Mark all defects with painter’s tape; note any water staining or movement cracks.
- Prioritize high-touch zones: hallways, entries, and behind doors.
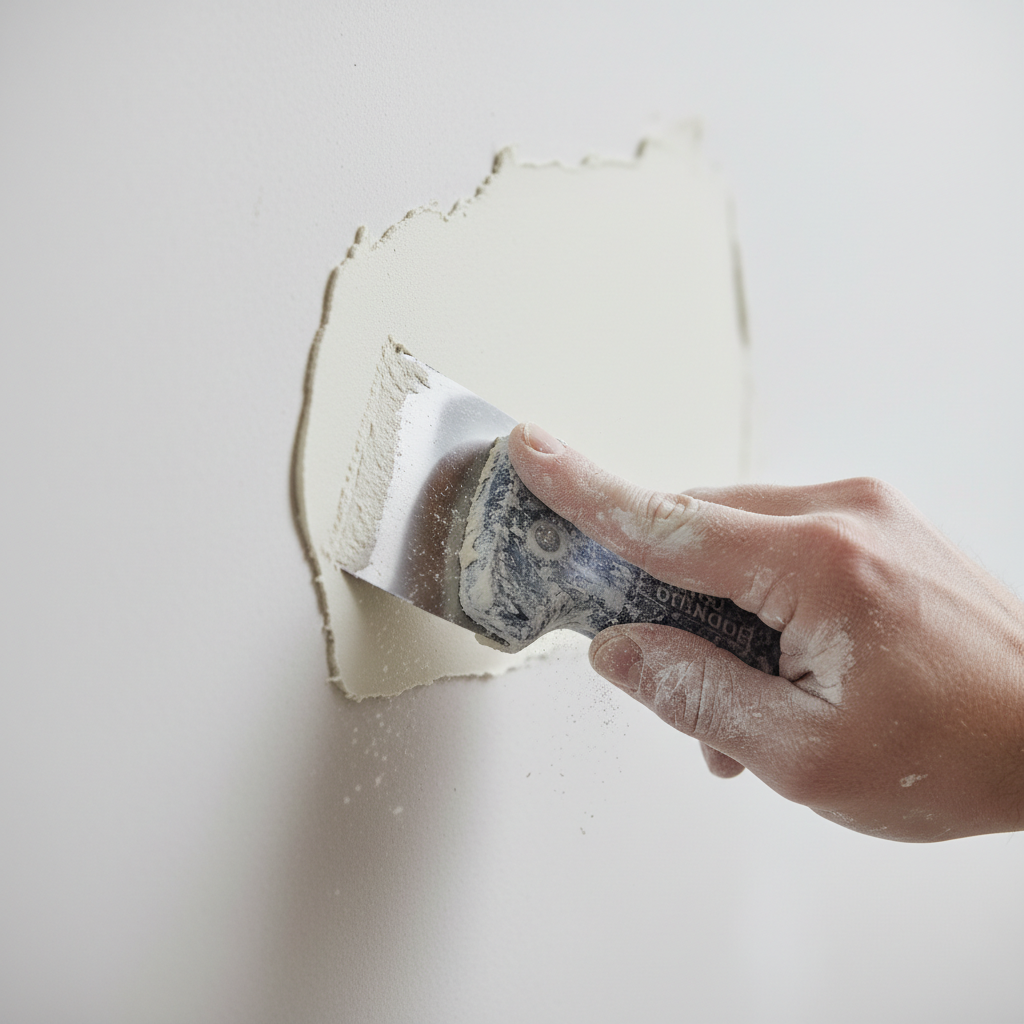
- Repair small holes (≤1/2 in)
- Use lightweight spackle or premix compound; overfill slightly by 1–2 mm.
- Feather 2–3 in beyond the hole to avoid edges.
- Repair medium holes (1/2–2 in)
- Back with mesh patch; apply two coats of compound, each 20–30 minutes apart (fast-set), or per manufacturer cure.
- Expand feathering to 6–8 in for seamless transition.
- Cracks and failed seams
- V-groove stress cracks ~1/8 in deep; bed with paper or fiberglass tape.
- Apply two skim coats, widening 2–3 in each pass.
- Sand progressively
- Knock down ridges with P120; finish with P180–P220 for paint-grade smoothness.
- Use pole sander for planes; sanding sponges for corners and beads.
- Dust removal
- HEPA vacuum then tack cloth. Dust loads above a light haze will cause roller skip.
- Run hand-light checks at a 45° angle to spot ridges and pinholes.
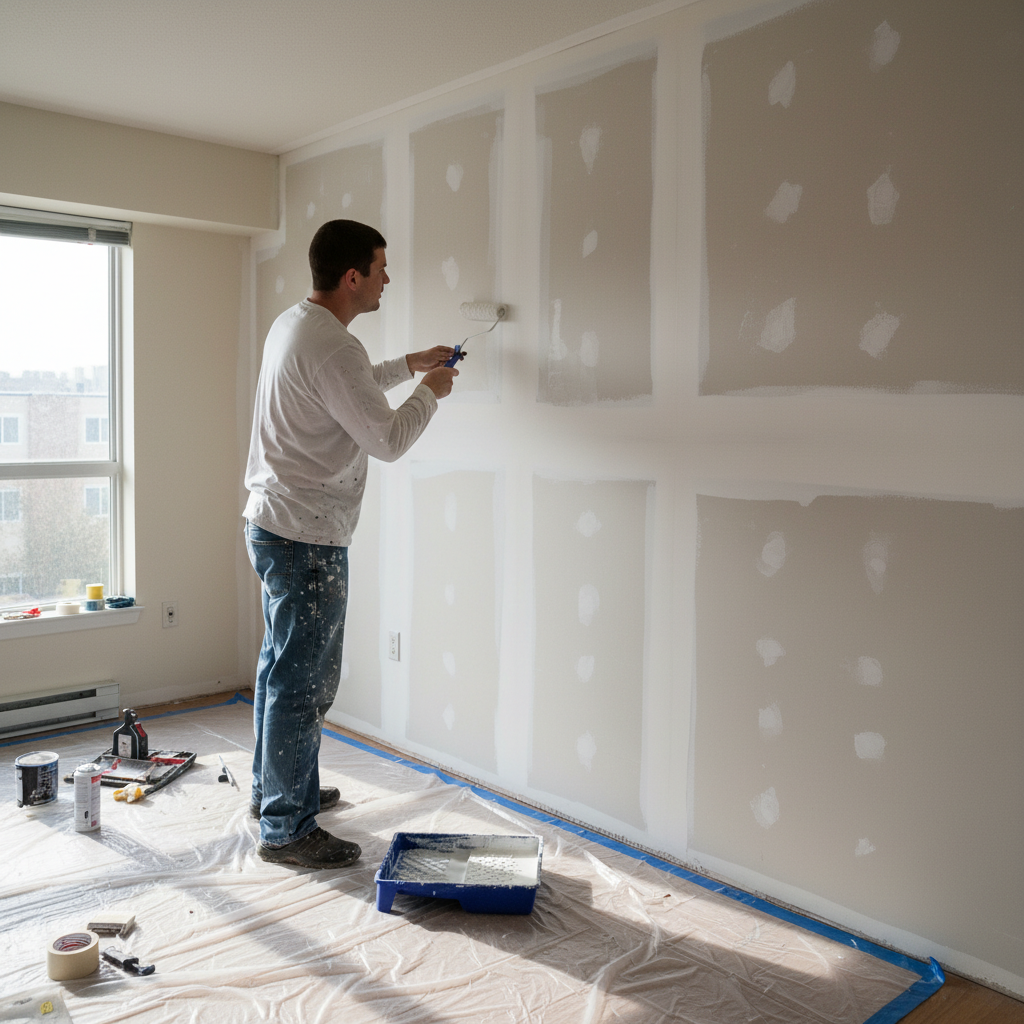
- Spot-prime repairs
- Prime all bare compound and stains. Aim for 100% coverage of patches plus 1–2 in overlap.
- Typical primer coverage: 250–400 sq ft/gal depending on substrate porosity.
- Paint and inspect
- Two uniform coats, maintaining a wet edge. Recoat windows commonly 2–4 hours.
- Final walkthrough at 5–6 ft viewing distance under natural and artificial light.
For turnover scheduling impacts and trade stacking, we share tips in our apartment turnover mistakes playbook.
Types of wall damage and the right repair methods
Match the method to the defect. Small holes need quick-fill spackle; seams require tape; irregular surfaces benefit from skim coating; water stains demand stain-blocking primer before paint.
Choosing the wrong method wastes time. Over-filling small holes or skipping tape on cracks causes returns within weeks. Use this matrix to align defects with fixes that hold up under tenant move-ins and regular cleanings.
Common defects and fixes
- Nail/screw pops: Reset fastener slightly below surface; fill and feather. Expect 1–2 coats.
- Small holes (≤1/2 in): Spackle, 2–3 in feather, sand P180. Prime spot.
- Medium holes (1/2–2 in): Mesh backing + premix compound; 6–8 in feather. Two coats minimum.
- Large holes (>2 in): Cut to clean square, add backer or new drywall insert; tape and mud seams.
- Stress cracks: V-groove; tape and two coats. Monitor seasonal movement.
- Loose tape/blisters: Remove, retape, and float 8–10 in for invisible transitions.
- Water stains: Ensure source fixed; apply stain-blocking primer before topcoat.
Process comparison
| Approach | Best for | Pros | Watch-outs |
|---|---|---|---|
| Spot patching | Discrete holes, small defects | Fast (minutes per patch), minimal material | Risk of mapping if not primed; edge telegraphing |
| Skim coating | Wavy or textured walls, multiple defects | Uniform plane and absorbency | More time; requires consistent technique |
| Drywall replacement | Large holes, saturated or moldy board | Resets substrate; longest life | More disruption; coordinate debris handling |
Corner detailing matters. For bead repairs and edge integrity, see this drywall bead installation guide for best-practice profiles and transitions.
Best practices to prevent bumps, flashing, and call-backs
Feather wide, sand fine, and always prime patches. Control humidity, use clean rollers, and inspect under raking light. These habits eliminate most paint defects and reduce tenant issues.
We’ve found consistency beats heroics. Simple repeatable moves—like widening feathering by 2–3 in on every coat—erase 80% of post-paint touch-ups across multi-property portfolios.
Execution habits that pay off
- Feather wider than you think: 6–8 in for medium repairs; 10–12 in on re-taped seams.
- Sand in stages: P120 for knocks, finish P180–P220. Over-sanding exposes paper.
- Prime all patches: Spot-prime compound and any stained areas before the first coat.
- Light right: Use a flashlight or 45° raking light to spot ridges and pinholes.
- Control climate: Keep 40–60% RH; swings slow cures and cause flashing.
- Mind the sheen: Higher sheen shows more defects; stick to one sheen per program.
Local considerations for London
- Seasonal humidity swings mean allow extra cure time in damp weeks and use dehumidifiers during turnovers.
- Winter ventilation is limited; choose low-odor, low-VOC systems and plan paint after quieter tenant hours.
- High-traffic student and commuter corridors benefit from reinforced seams and scrubbable finishes.
For final sign-off structure, our quality handover checklist sequences lighting checks, touch-point testing, and cleanliness standards.
Tools, materials, and resource checklist
Standardize your kit: joint compound, tapes, sanding grits, stain-blocking primer, and a single paint system. Consistency speeds crews and yields repeatable results across units.
A consistent kit shaves minutes off every patch and removes guesswork. We inventory kits per floor to avoid elevator waits and trade traffic.
Your core kit
- Compounds: lightweight spackle; all-purpose premix; fast-set powder (20–45 minute).
- Tapes: paper for flats; fiberglass mesh for repairs; outside/inside corner beads.
- Knives: 3–4 in, 6 in, 10–12 in; hawk or mud pan.
- Sanding: P120, P150, P180–P220; pole sander; sanding sponges.
- Dust control: HEPA vacuum; tack cloths; plastic sheeting; zipper doors.
- Primers: general drywall primer; stain-blocker for water marks.
- Paint: one sheen program; two coats; maintain wet edge and coverage rates.
- Lighting/QA: headlamp or flashlight; blue tape for defect marking; moisture meter when needed.
For broader interior paint planning, this interior painting guide outlines coverage patterns and rolling techniques that pair well with disciplined prep.
Case studies and examples from multi-unit turnovers
Standardized wall prep reduces punch items and speeds move-ins. These brief examples show where structured patchwork saved days across London, ON apartments and regional properties.
We don’t disclose client identities, but the patterns are consistent. Repairs, priming, and paint sequencing delivered faster handovers and cleaner sign-offs—without after-hours call-backs.
Example 1: Student corridor refresh
- Problem: 60+ nail pops and anchor holes per hall after semester turnover.
- Action: Mesh-backed medium holes; standardized feather widths; spot-primed all compound.
- Result: Touch-up list shrank by ~70%; corridor reopened 24 hours sooner than prior cycle.
Example 2: Moisture-prone bath walls
- Problem: Paint peeling near tub-surround seams; recurring stains.
- Action: Retaped seams; stain-blocking primer on repairs; shifted to scrubbable finish.
- Result: No peel reports at 3–6 month checks; maintenance work orders dropped notably.
Example 3: Accent wall with heavy defects
- Problem: Tenant-installed shelving left 30+ large anchors.
- Action: Cut-and-plug drywall inserts; full-length skim coat to reset plane.
- Result: Zero mapping under eggshell; leasing photos taken same day after cure window.
Coordinating repairs alongside other trades? Our remodel timing guide explains how to stack painting after dust-producing work.
QA standards and inspection cues before handover
Inspect at two distances under mixed lighting. Look for edge ridges, sheen shifts, and texture mismatches. Touch surfaces lightly—no chalking, no powder transfer, and no raised edges.
We validate walls like we validate flooring seams: sight, light, and touch. This neutralizes subjective complaints and speeds documented approvals at handover.
- Lighting: daylight plus ceiling fixtures; raking light for planes.
- Viewing distance: 5–6 ft at natural posture; then close-up at 1–2 ft for corners.
- Surface feel: gentle palm swipe—no gritty feel; no ridge catch.
- Adhesion: painter’s tape pull on primed patch corner should not lift.
- Documentation: mark any misses with tape, correct, and re-inspect in 30–60 minutes.
Our team in London bakes these checks into every turnover to keep vacancy periods tight and predictable.
Common pitfalls and how to avoid them
Most repaint defects trace back to narrow feathering, skipping primer, or sanding too coarse. Fix these, and you’ll avoid mapping, flashing, and roller skip on 90% of jobs.
Rushed prep shows instantly under semi-gloss light. When in doubt, widen the feather, refine your sanding, and prime anything that looks even slightly porous or stained.
- Too-narrow patches: Edges telegraph after drying. Add 2–4 in to your feather width.
- Skipping primer: Patches absorb differently; spot-prime every repair.
- Over-sanding: Fuzzed paper flashes gray under paint; backfill, then resand fine.
- Wrong sheen: Mixing sheens unit-to-unit complicates touch-ups and shows defects.
- Dust left on surface: Causes roller chatter and adhesion loss; HEPA, then tack.
For cabinet and enamel-adjacent surfaces, see this bath and kitchen paint guide that pairs well with moisture-prone areas.
Downloadable turnover checklist (apply this per unit)
Use a repeatable 12-point checklist per room: defects marked, repaired, sanded, dusted, primed, painted (2 coats), edges checked, stains blocked, corners smoothed, sheen verified, photos logged, and supervisor sign-off.
Turnovers move fast. Checklists protect quality when you’re juggling keys, cleaners, and leasing photos. Even a 2–3 minute pass saves a return trip.
- Mark all defects (blue tape).
- Patch small/medium holes; retape seams if needed.
- Feather coats wide (6–12 in as needed).
- Sand P120 → P180–P220.
- HEPA vacuum; tack cloth.
- Spot-prime all compound and stains.
- Cut-in; roll coat 1; maintain wet edge.
- Recoat per label window.
- Check under raking light; correct misses.
- Verify sheen and color consistency.
- Photo log walls and corners.
- Supervisor sign-off.
Service fit: When to DIY vs. call a WSIB-compliant contractor
DIY works for cosmetic patches and routine repainting. Call a WSIB-compliant contractor for recurring cracks, moisture damage, large holes, or multi-unit scheduling where safety, speed, and consistency matter.
In our experience, the tipping point is scale and risk. If you’re lining up more than a few units per week—or dealing with leaks and structural movement—bring in specialists to control timeline and quality.
- DIY-suitable: small holes, nail pops, light scuffs, isolated touch-ups.
- Contractor-suitable: repeated seam failures, water intrusion, mold concerns, occupied-unit phasing.
- Multi-unit ops: standardized finishes across buildings for easy touch-ups and ordering.
Frequently Asked Questions
Spot-prime every repair, feather wide, and sand fine. Most repaint problems disappear when you follow these three rules. The answers below address the questions we hear most from property teams.
Do I need to prime every drywall patch before painting?
Yes. Patches absorb paint differently and will flash if unprimed. Spot-prime all compound and any stains to equalize porosity and sheen. This single step prevents mapping and saves a second coat later.
What grit should I use for sanding wall repairs?
Use P120 to knock down ridges, then finish with P180–P220 for paint-grade smoothness. Coarser grits leave scratches that telegraph through eggshell and semi-gloss finishes.
How do I stop cracks from coming back?
V-groove the crack, embed tape, and apply two skim coats, widening each pass. Control indoor humidity swings. Without tape reinforcement, stress cracks often reappear within seasons.
Can I paint over water stains?
Not directly. First, fix the moisture source. Then apply a stain-blocking primer to isolate discoloration. Once dry per label, proceed with two finish coats for a uniform result.
Key Takeaways
Feather wider, sand finer, and always prime patches. Control humidity and light your inspections. Standardize materials across units to speed crews and make touch-ups predictable.
- Prep is the performance driver—paint simply reveals your surface.
- Spot-priming equals porosity and kills flashing under new coats.
- Standard kits and checklists reduce punch items and turnover time.
- Call WSIB-compliant crews for multi-unit scale, moisture, or movement concerns.
Related topics and next steps
Integrate wall repair standards into your broader turnover plan. Sequence dust-heavy work before painting, align QA with handover, and document finishes to simplify future touch-ups.
For broader turnover planning, align this guide with our pieces on handover checks and turnover timing. Use one sheen program and color set across buildings to keep maintenance simple.
Ready to standardize? Our London, ON contractor team supports property managers with full-unit turnovers, bathroom and kitchen remodeling, flooring and tiling, and paint and repairs.
Conclusion: Make paint your finish, not your fix
Treat walls like a system. Repair, sand, dust, and prime systematically, then paint. This sequence produces smooth, durable finishes, fewer callbacks, and faster move-ins across multi-unit properties.
Here’s the bottom line: consistent prep yields consistent results. If you manage multiple units, the fastest way to reduce vacancy periods is to eliminate rework. We’re set up for exactly that—with standardized finishes, WSIB-compliant teams, and a turnover-first mindset. Book a turnover walk in London today and move your schedule forward.